If you are wondering how I ended up with a lump of engine, check out the first installment of the series here.
The first thing I had to do when tackling this project of stripping down an R1 engine was admit to myself that I had no idea what I was doing. Don’t get me wrong, I have performed my share of mechanic related tasks before, but nothing nearly as in-depth as poking and prodding a high performance transmission. When you go in erring on the side of caution, you will find yourself paying better attention to details.
Most modern sport bikes combine their engine and transmission into the same case. Unlike a car, they really aren’t separate entities.
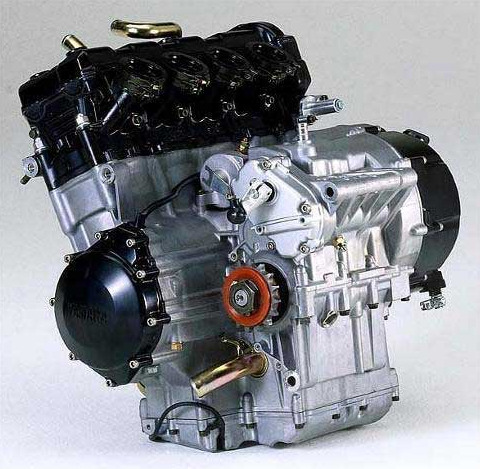
If something goes wrong with either, you have to disassemble both. This means the transmission is lubricated by the engine oil, as is the clutch. This set up provides easier maintenance, more compact packaging, and lower overall weight. What it does not provide is straight-forward disassembly. How interesting!
The first task at hand in splitting the engine case is to remove all ancillary systems from the engine. This brings us to the most difficult item of the whole strip down process. The Achilles heel of R1 engine tear-downs. The sole reason many people swear never to own a Yamaha.
Removing the flywheel
When you remove the left side stator cover, you are met with one of the fiercest rivals in all of motorcycle maintenance. Unassuming and cold, silver drum of steel.
The flywheel.
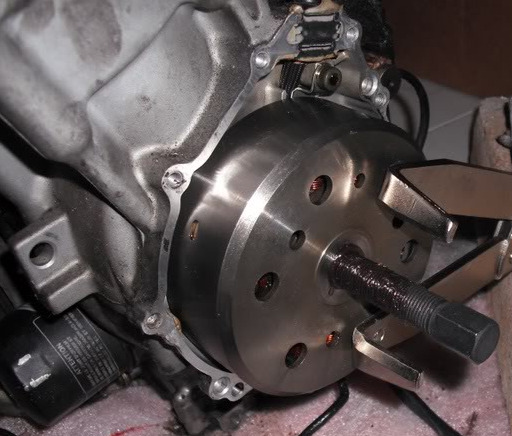
This thing is press fitted onto the end of the crankshaft and has experienced hundreds of heat cycles to further fuse it securely in place. To add to that, on the back side of the flywheel are large, very strong magnets that further keep the damn thing in place. Yamaha has a special tool for removing this – I did not.
A common method of attempting to remove the flywheel is to insert a bolt of the same size and pitch into the threaded hole that is machined into the middle of the flywheel. The theory is that the bolt will push against the crankshaft and pull the flywheel outwards. It sounds simple enough. However, Yamaha has included just the precise number of threads on the flywheel to ensure that you strip the bejeezus out of it if you attempt to apply the required amount of torque. Don’t ask how I know. So, I had to get creative.
Enter three arm puller and crankshaft-sized bolt. When a task like this appears impossible without the special factory tool, sometimes it is best to sit back and think about the objective for a few minutes with a drink of your fancy. Peering into the center flywheel hole you can see the end of the crank shaft. The end of the crankshaft is hollow and threaded. I can insert a bolt into that. Looking at the flywheel itself, you begin to realize it has holes around its perimeter. These are perfect grab points for the arms of the puller. Put the two concepts together and you have the perfect down-home apparatus for yanking this arch-nemesis out of there.
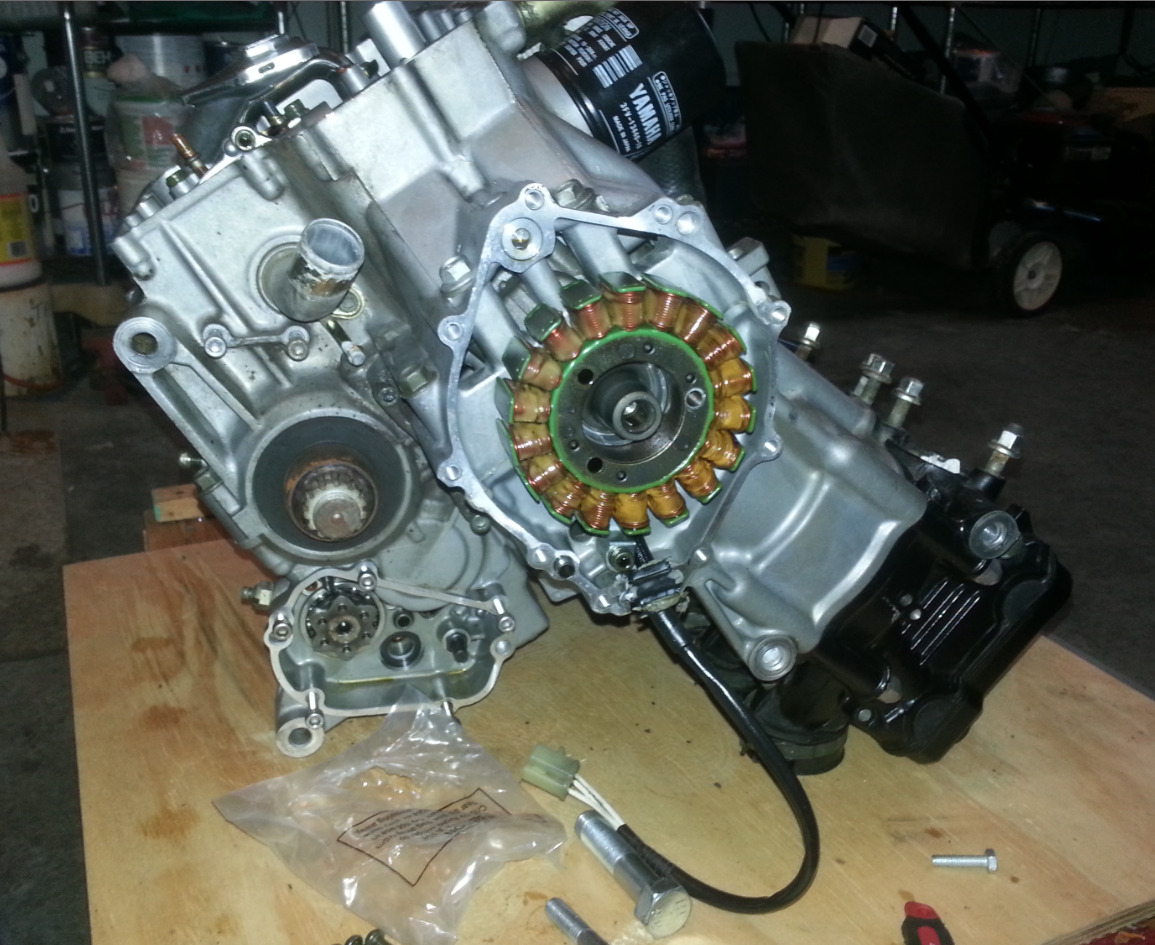
Let me be the first to tell you that this method works. Also be prepared for the second-coming of the shot heard ‘round the world, as the bang that results from the divorce of crankshaft and flywheel will put the loudest of muskets to shame and have you checking your pants for presents. I certainly wasn’t expecting it.
Tada! Behind the flywheel is the stator. These two parts are the heart of the bike’s charging system. The stator can now be removed with relative ease. Take this time to bask in its electro-wizardries.
The Easy Side
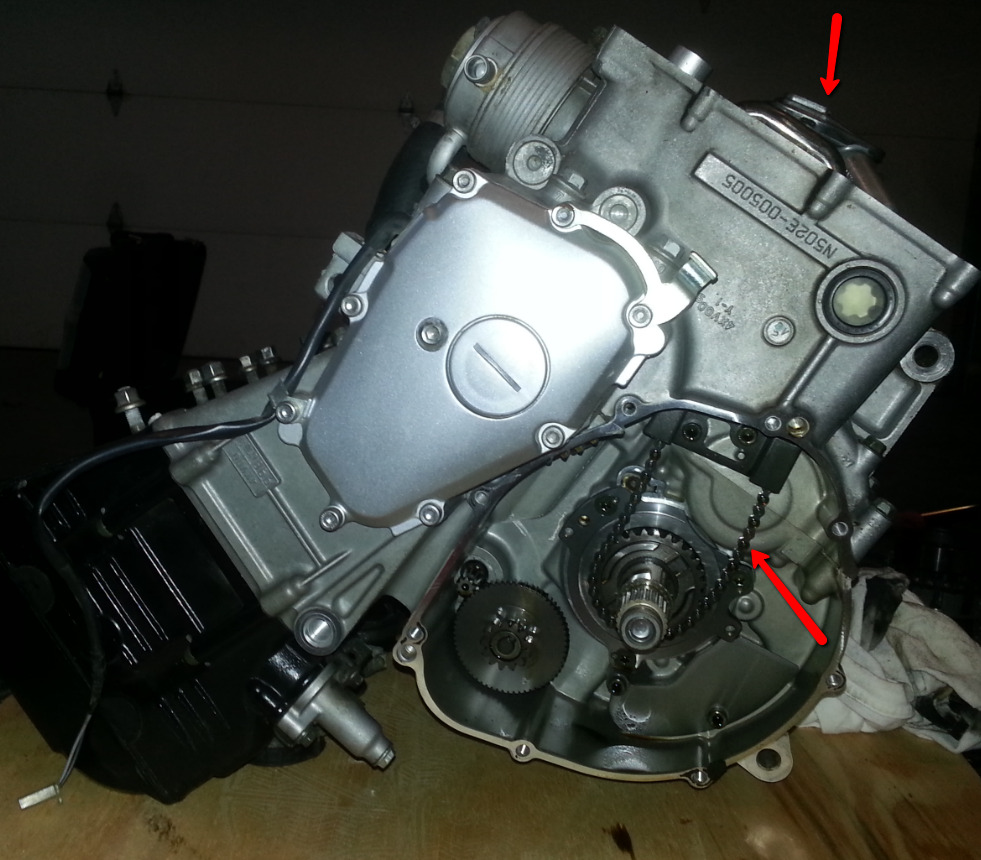
On the other side of the engine reside the driveline ancillary systems. In essence, the clutch and timing components. Neither of these is very difficult to remove but they will give you hell on reassembly if you don’t pay attention to how they went together.
As you can see, the previous owner went through the hassle of removing the clutch cover then stuffed it full of paper towels. I can’t think of a better long-term storage solution!
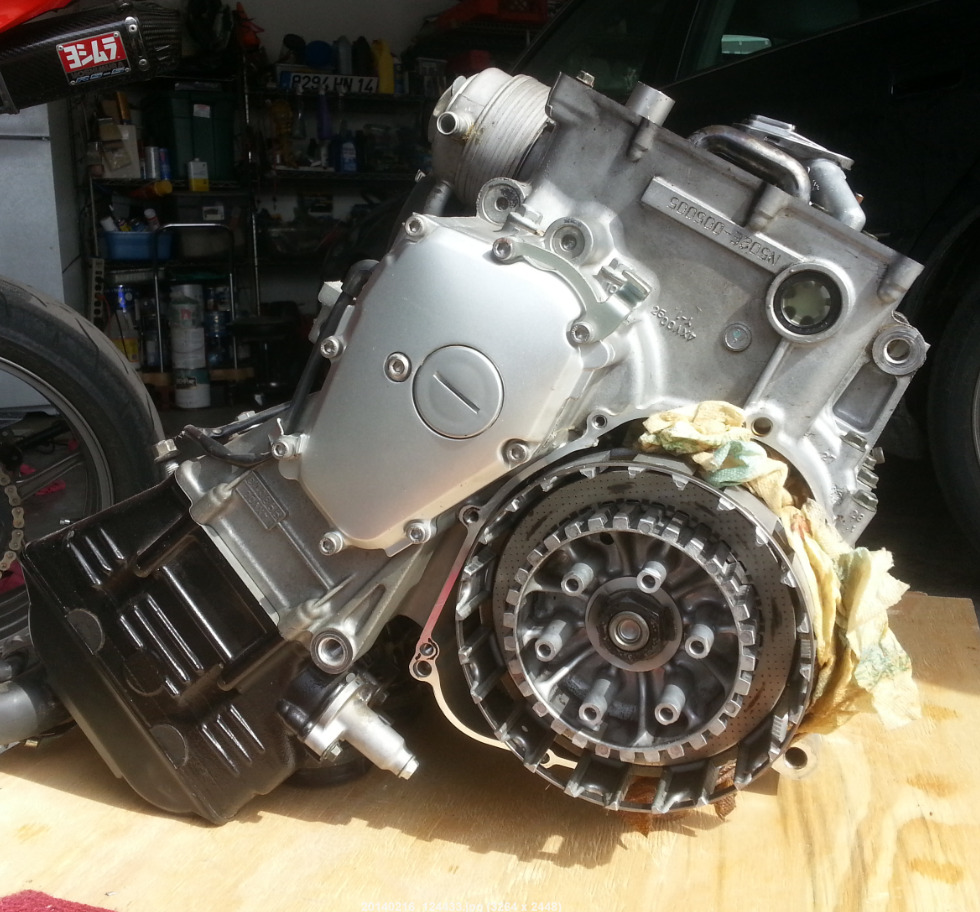
Now, there is a nice tool out there for removing the clutch basket. It looks like a pair vice-grips but with really long arms with right angled fingers at the end. Don’t ghetto rig this one, they are cheap enough and can be bought at any bike shop. With that tool holding the clutch basket, use a rachet (or impact gun) to undo the main nut. Off she comes.
Next, remove the timing cover.
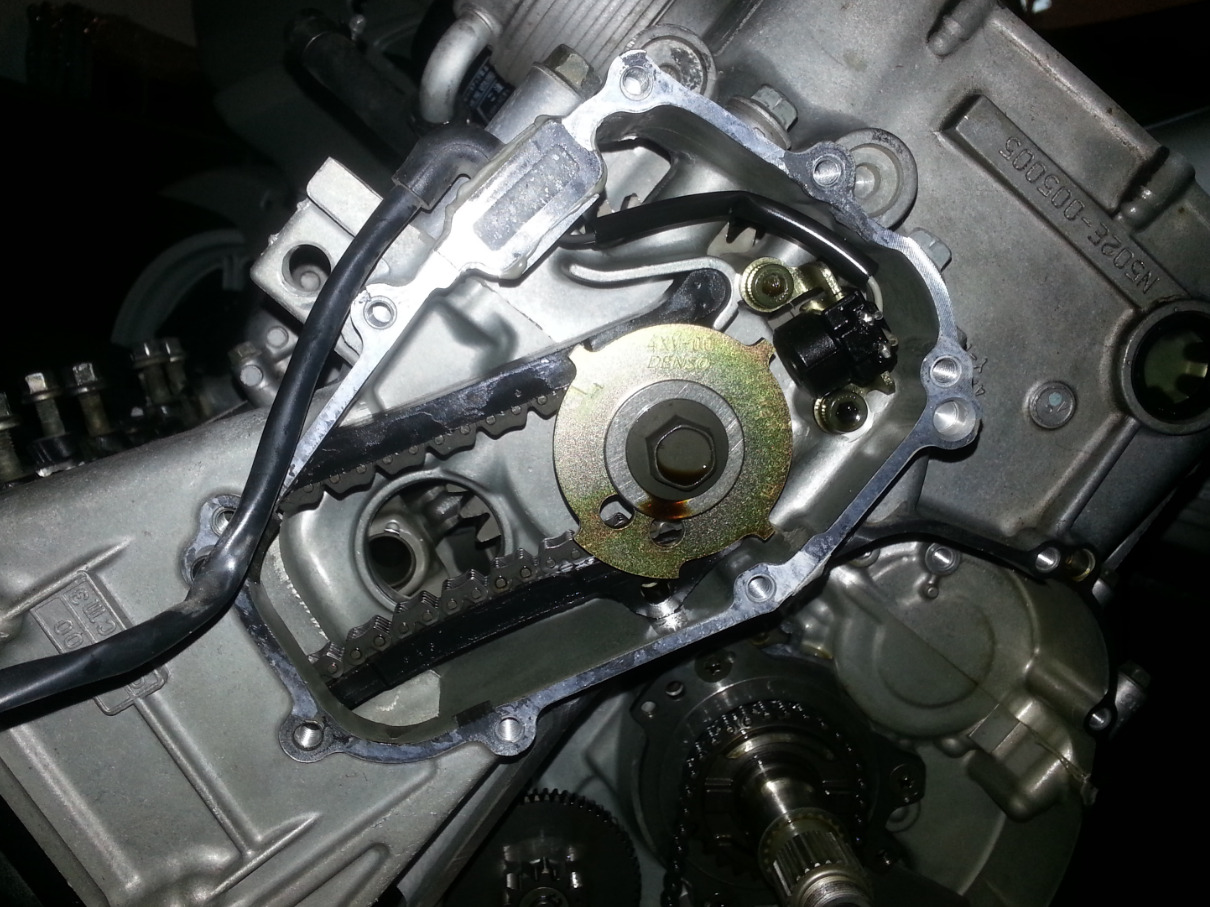
After spending the good part of day trying to figure out how to remove the sprocket at the end of the timing chain, it became apparent that its removal was not necessary.
NOTE: It is important to spend an unexplainable amount of time chasing things that don’t need to be chased. These are the sort of situations make you a pro the next time around. Word.
As it turns out, the only thing that needs removed here is the position sensor in the top right. Boom. Done.
The next part is really fiddly. You must remove the water pump and oil pump, which happens to be chain driven off of the input shaft (where I just removed the clutch basket from).
This procedure falls into a mechanic’s version of the chicken-or-the-egg scenario. To get the chain off of the input shaft, you have to remove the water/oil pump. To remove the water/oil pump, you have to get the chain off of the input shaft.
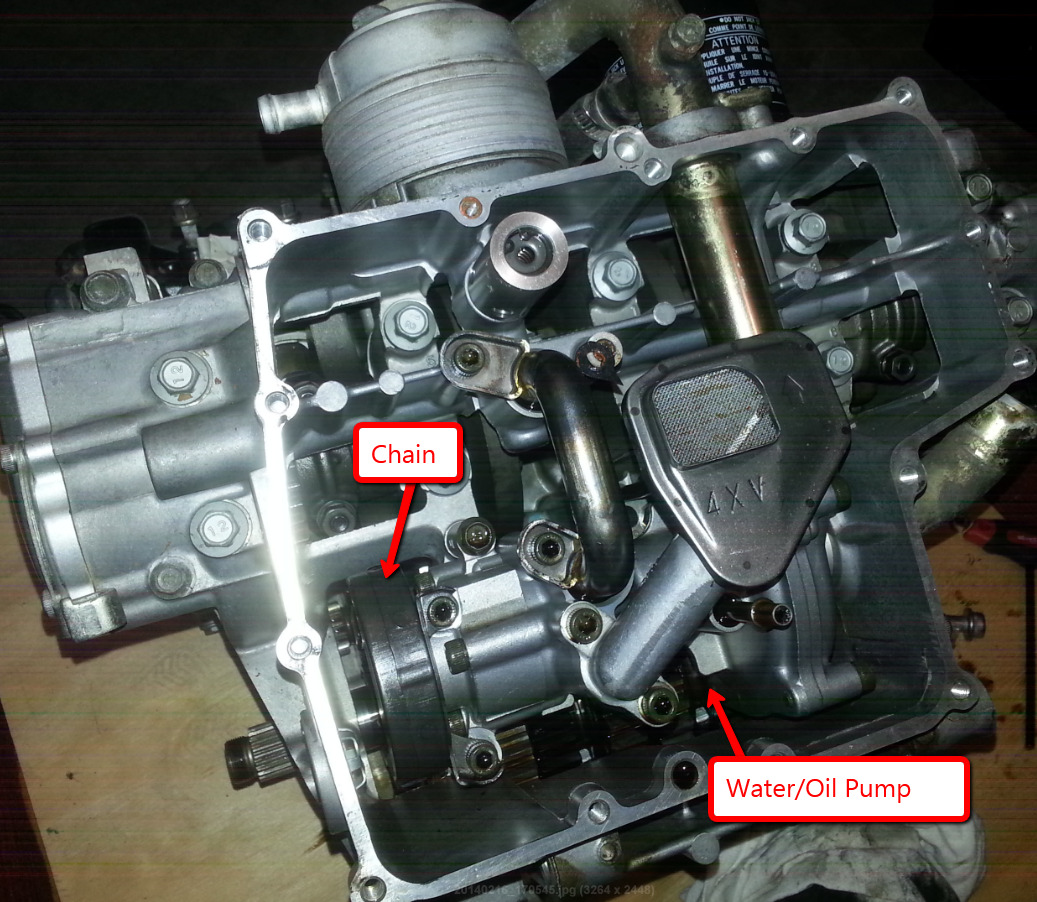
All I can say about this one is that I was able to do it. I slipped into a black out state and when I awoke I had the water / oil pump removed. It is a struggle but with enough choice words and handy motions, it can be done.
Are we there yet?
Yes! We are there! Now it is time to actually start splitting the cases.
When you’re staring at the bottom end of the engine you see a lot of screws and bolts. I mean, it’s as if the Yamaha engineers ran to the local hardware store, grabbed four of each type and size of bolt they had and then threw them into the CAD drawing. Such a sight can put the fun of tearing an engine down on full stop. This is where you MUST be organized when removing the bolts. You truly cannot have anything left over when reassembly occurs. Guys, seriously. This is important.
Removing some of these bolts is a frightening experience. They are all torqued down into the aluminum block and probably have never been removed before. Many feel like they are straddling the line of complete shearing. Have faith that they will not.
A few slight taps of the rubber mallet and the bottom case is liberated!
At this point it really hits home that there is no turning back now. I was inside this engine.
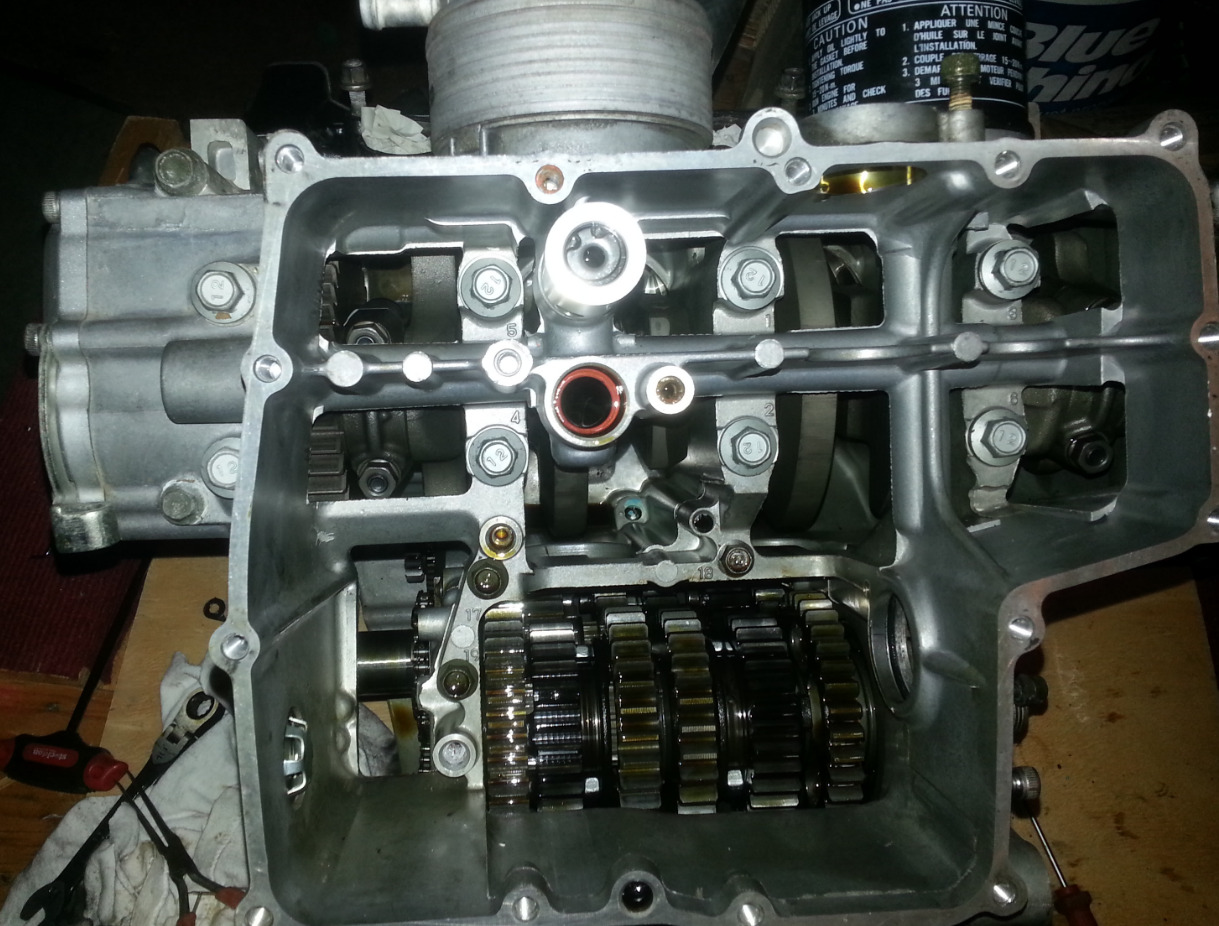
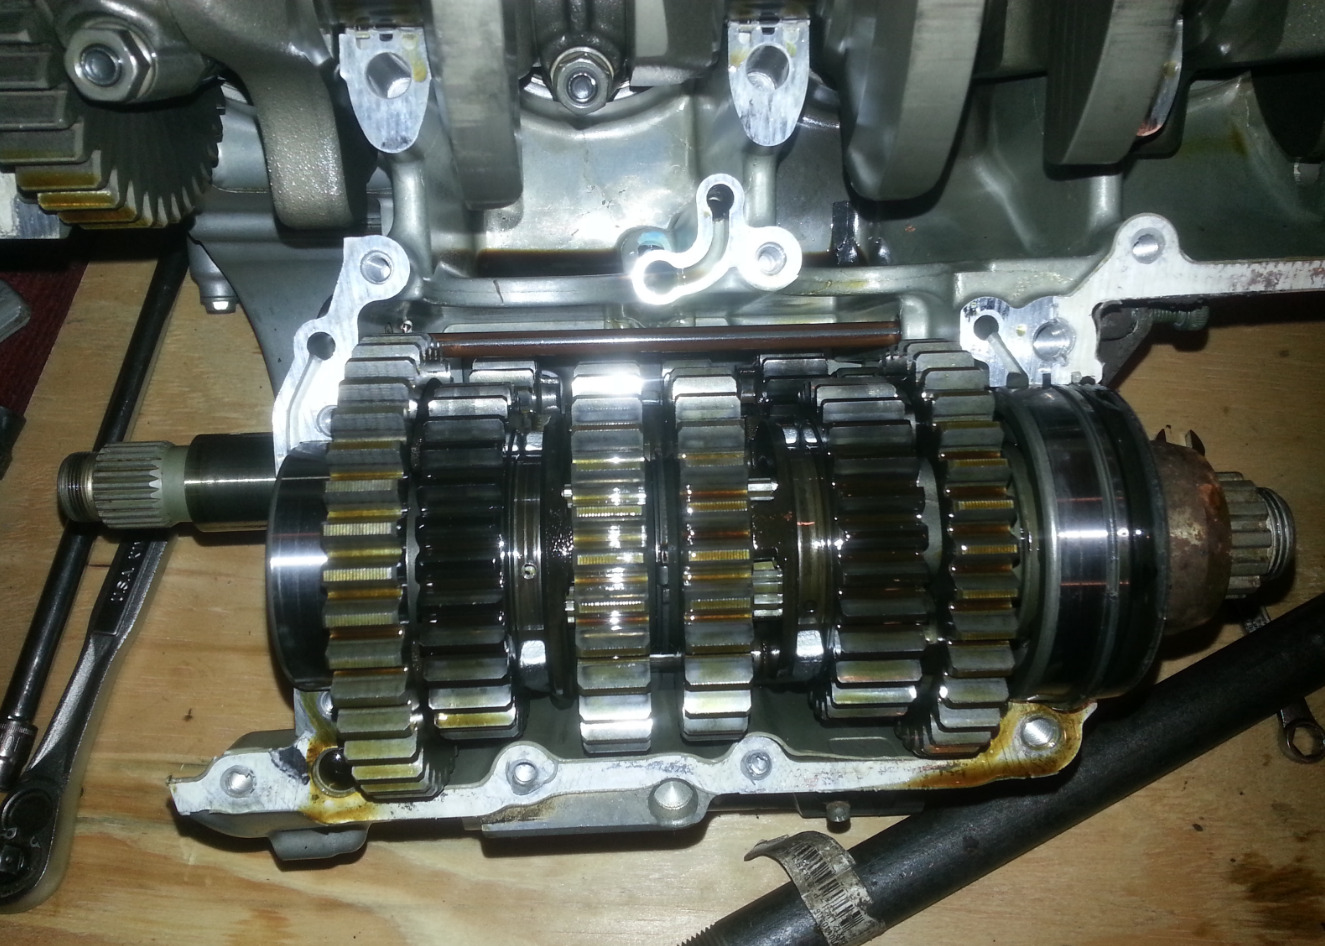
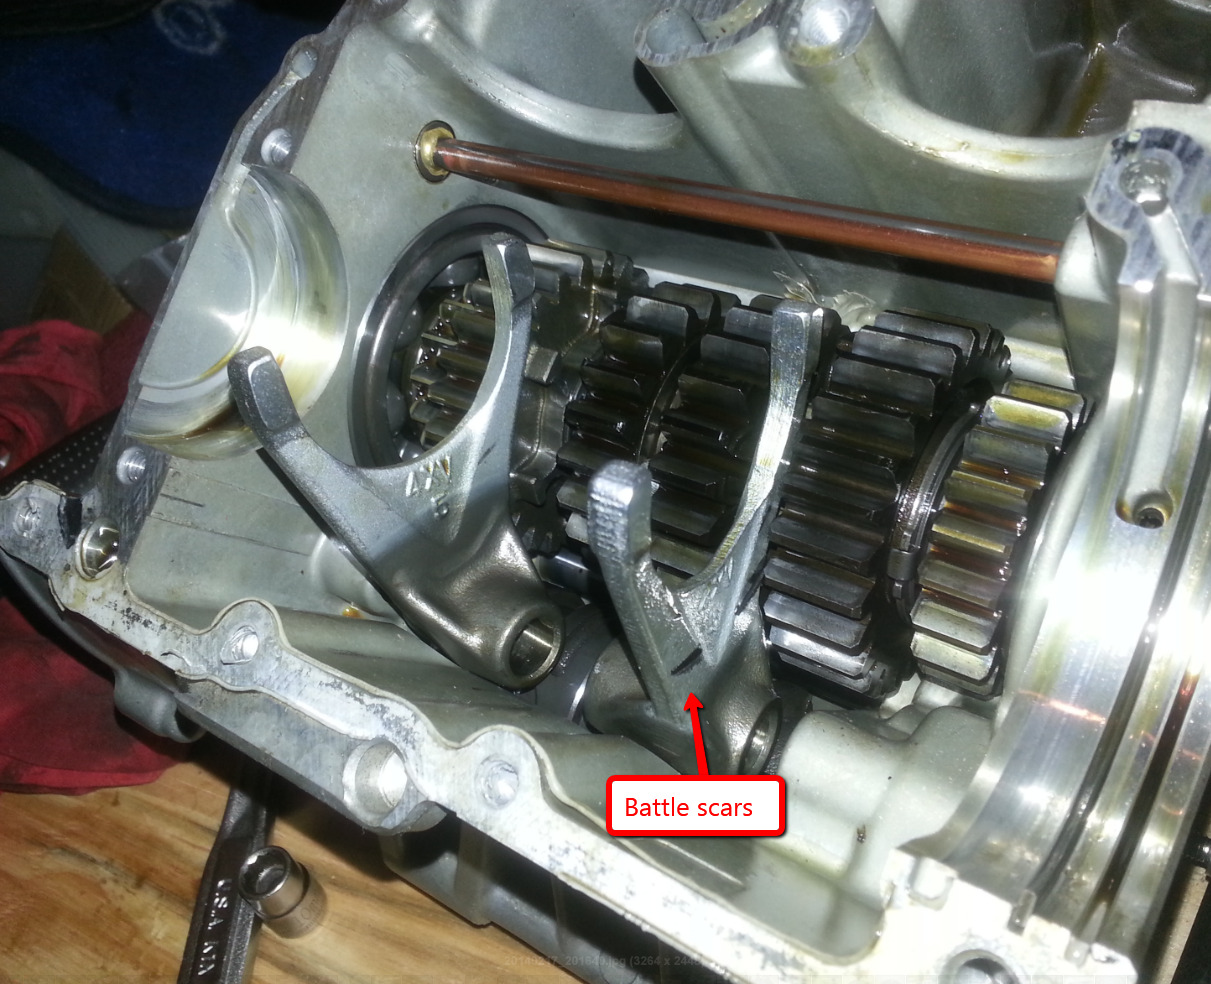
Next, I remove the output shaft which plays host to a whole set of gears. This sucker is heavy. With that out of the way, you are able to inspect the shift forks. These are the mechanisms that actually move the gears around in the transmission. Scarring on them points to bad shifts, which apparently this poor bike was subjected to. It is very common on older Yamahas for second gear to pop into neutral under hard acceleration. This is one of the causes.
I remove the input shaft which houses the other set of gears. Then, I move everything onto the kitchen table for absolute cleanliness to inspect!
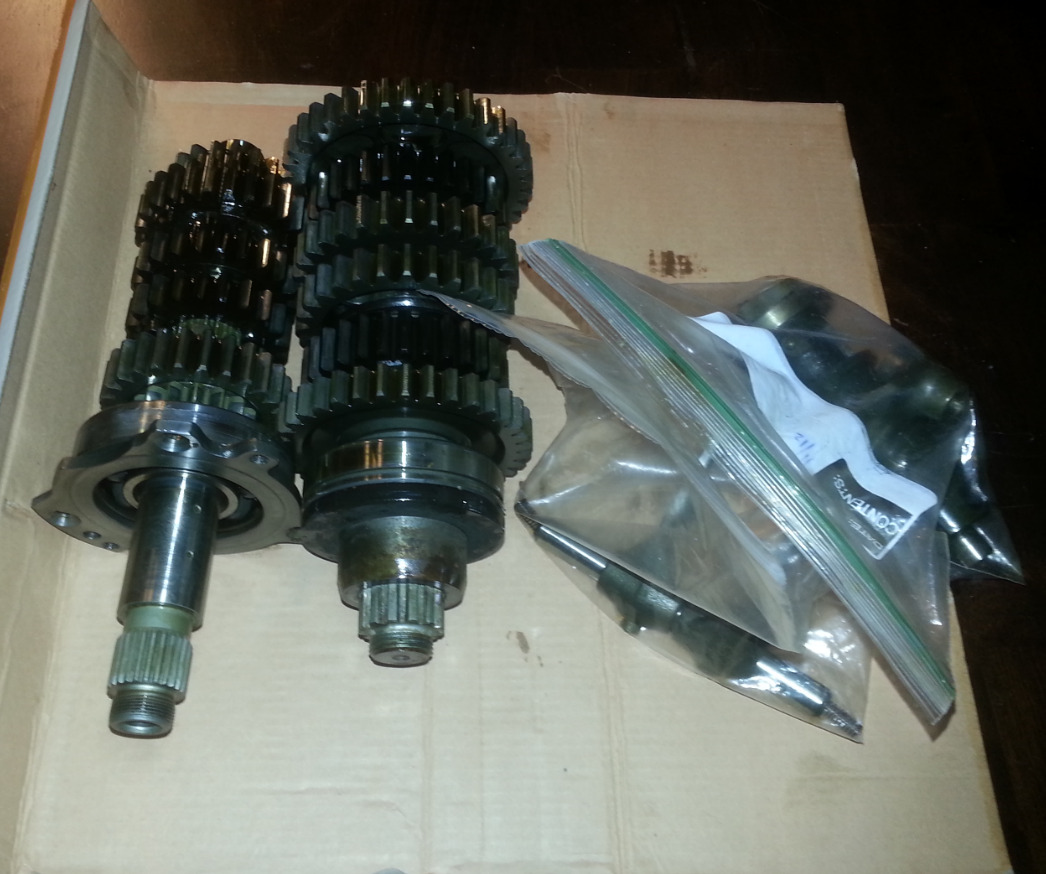
I start to remove the gears from the shafts – it also important to remember the order of things here.
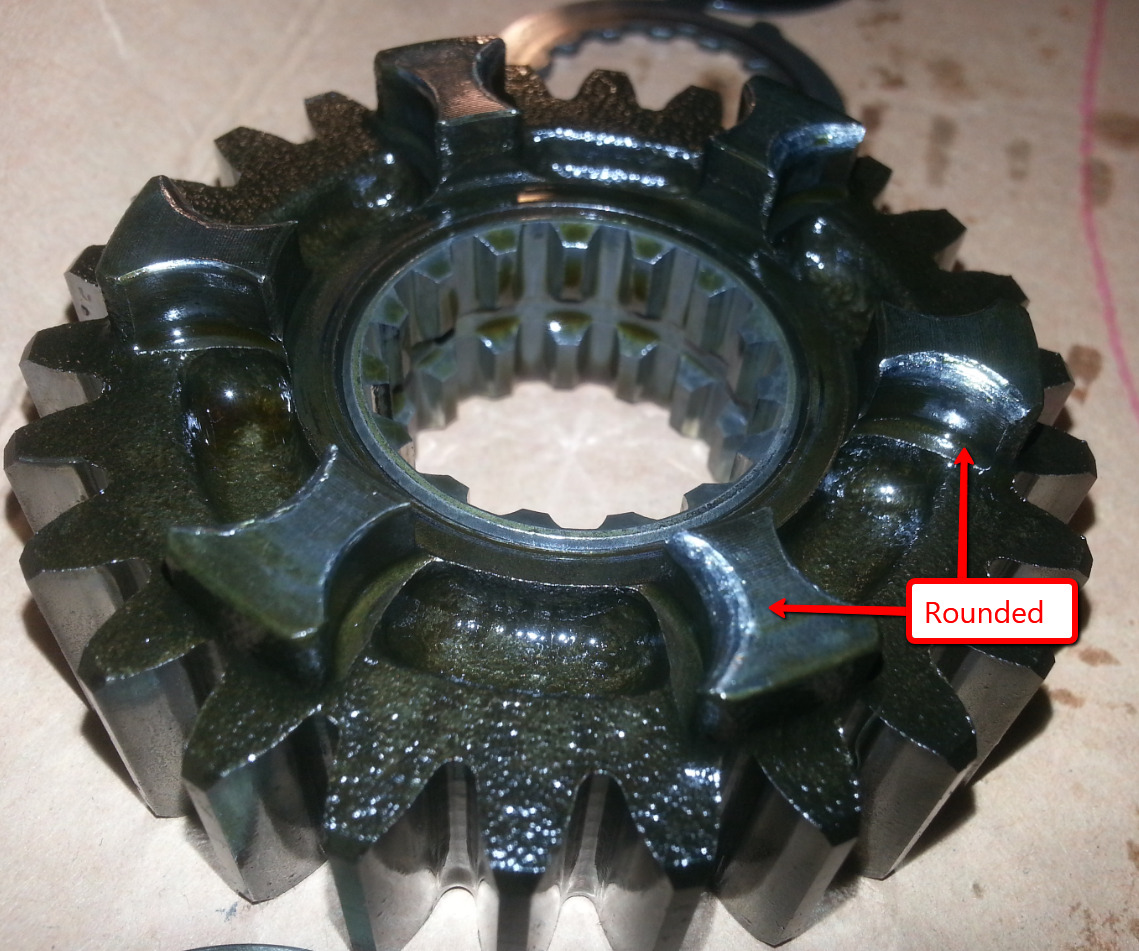
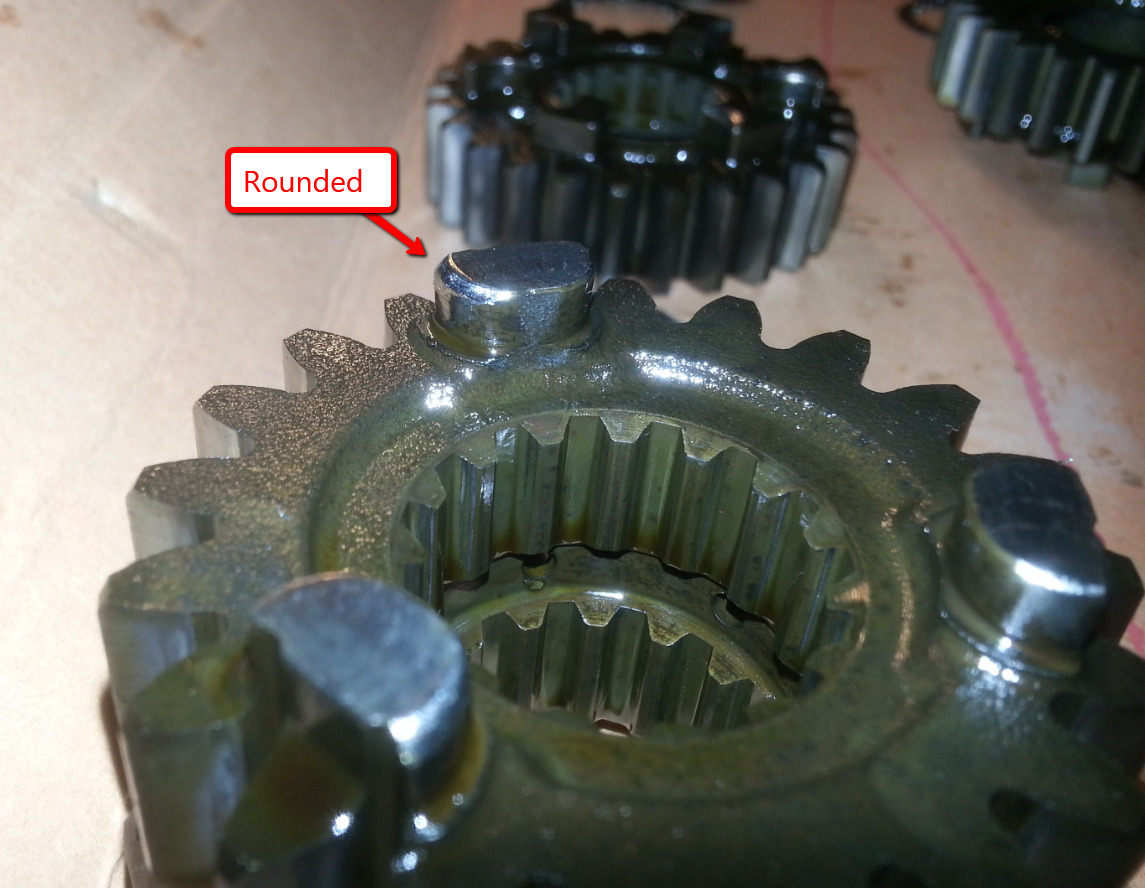
The gears in a motorcycle transmission are different than those found in a typical car’s transmission. A car’s transmission uses synchronizers to ensure that gears mesh appropriately when shifting. There is a slight pause between shifts to allow gears to match each other’s speed. A motorcycle is a completely different beast as it is a sequential transmission. You can’t skip gears in a motorcycle transmission. To get from second to fourth, you must first go through third. Synchronizers don’t exist in a motorcycle transmission. Their closest counterpart is called a “dog”. And let me tell, these dogs take a beating.
Every shift is metal-on-metal clash that produces wear. A good rider can feel and hear shifting “sweet spots” which produces as little wear as possible. However, especially among newer riders, some never develop good shifting technique. The poor transmission pays the price. Here are the male and female dogs on the gears I just pulled out this R1’s transmission. It is important to note that all of these dogs started life as completely 90-degree angles.
Female dogs:
Male dogs:
Every gear in the transmission was in a similar state. Remember the shift forks? Upon removing them, you could tell a couple of them had met similar demise.

What to do?
As you know, I only had at this point $300 wrapped up in the bike. I now arrived at a crossroad. There is no way I could put this engine back together with knowing the sorry shape of the transmission. I knew the low blue book value on the bike was around $2500. I could get out now, sell everything for parts, and live happily ever after, OR, I could essentially buy a whole new transmission in genuine new-old-stock Yamaha parts and give this bike back the life it deserved.
As I’m sure you have determined by this point, I am poor at making logical decisions. So the decision was made. I dived in bank-account first. I made a list of everything I needed. I put that list into a shopping cart. And I clicked “Buy”. The wait began.
Except there wasn’t any waiting around, because if you remember correctly, this whole bike was in pieces and there were plenty of other jobs to attend to aside from the engine and transmission. Check out my next installment to see all the periphery fixes I completed while waiting for the box of gold to arrive.
Expenditures so far:
Initial purchase: $300
Transmission rebuild parts: $1,235.97
TOTAL: $1,535.97
Leave a Reply