Level out that old 4Runner
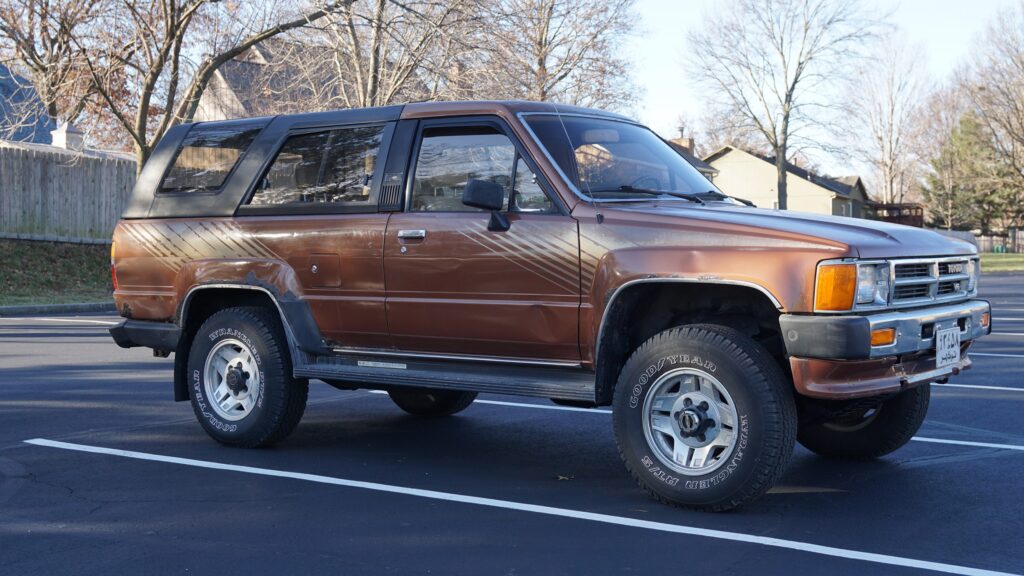
First-generation Toyota 4Runners (1984-1989) are ruggedly cool trucks with one sweet party trick: a removable roof. But, these classic SUVs don’t come without their faults. The most common of which is a droopy rear end.
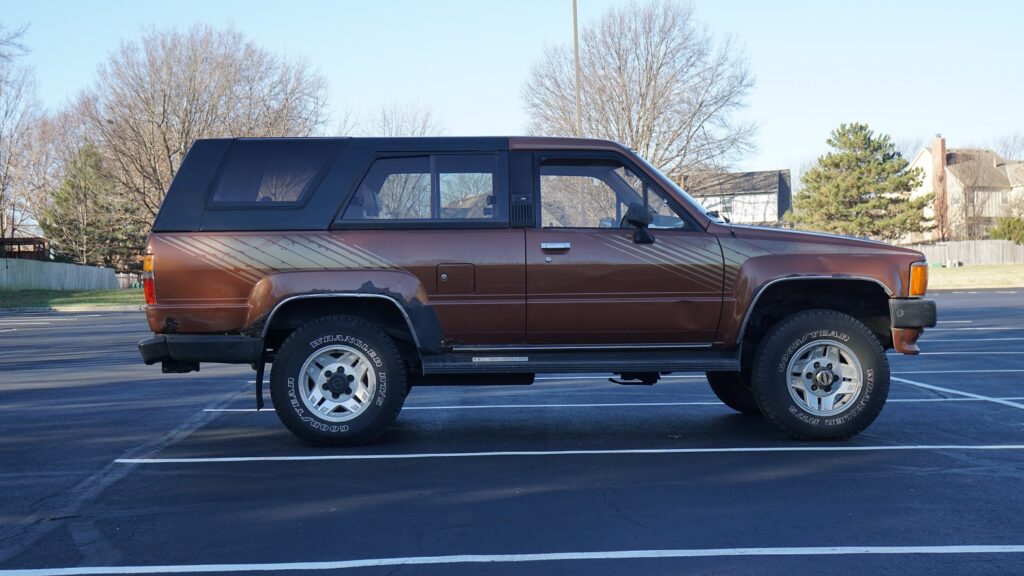
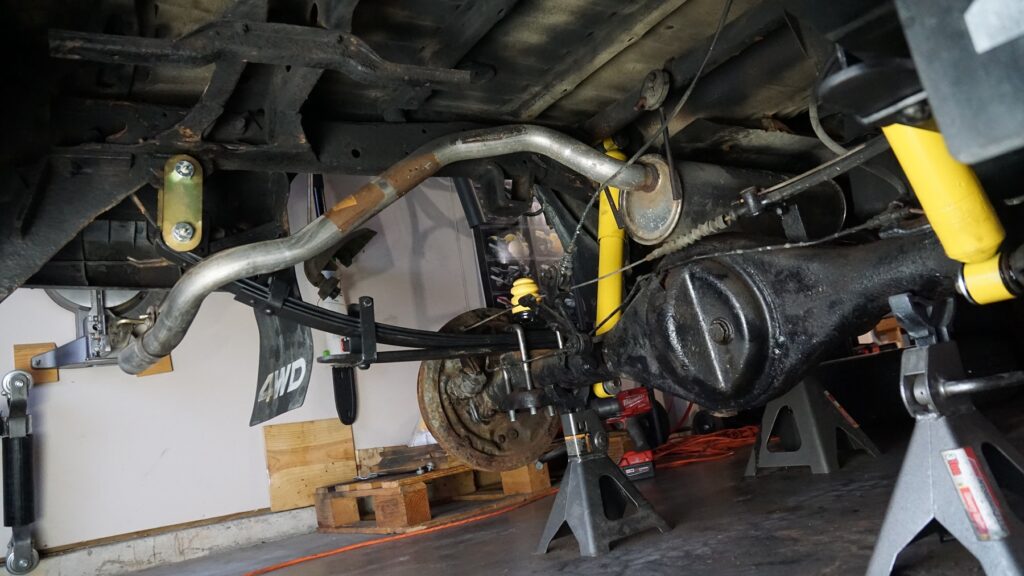
4Runners are fitted from the factory with the standard Toyota Pickup rear leaf springs, and over time these succumb to the added weight of the 4Runner’s removable top and rollbar. Corrosion and fatigue further weaken the springs which results in a squatting rear end.
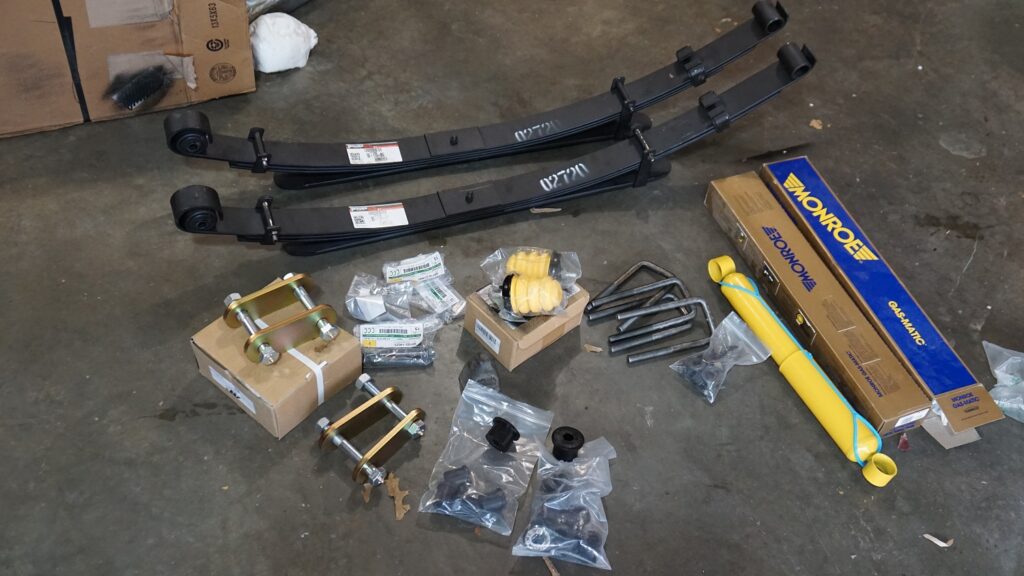
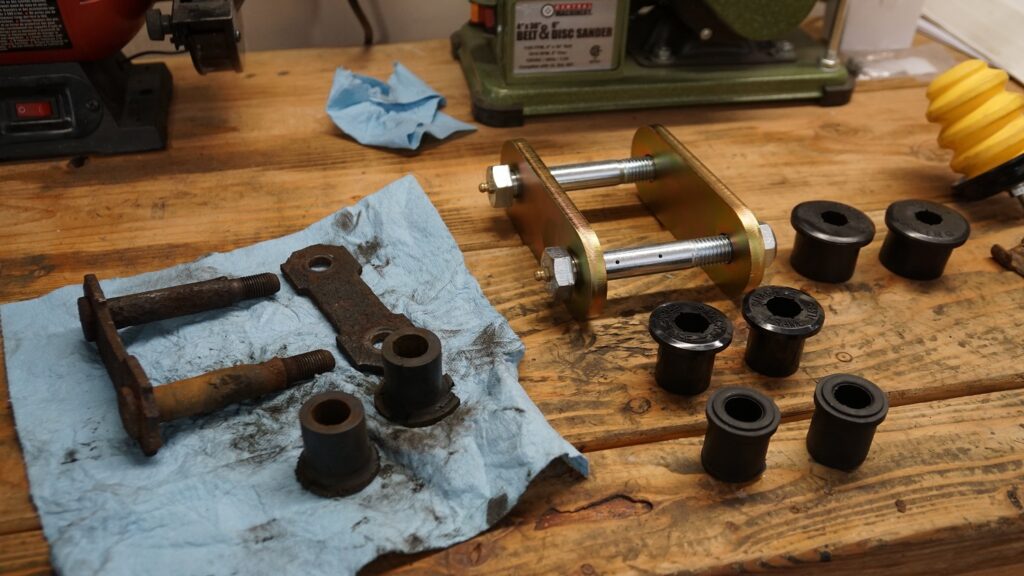
Fixing this issue properly requires an overhaul of the rear suspension. This means, at the very least, a pair of new leaf spring packs. However, if your 4Runner has lived its life where road salt is used like mine has, then you’ll likely need much more than that (See bottom for complete parts list).
Check out the video below for the detailed leaf spring replacement procedure:
It’s never simple, is it?
When it comes to rusty undercarriages, you can’t assume you can reuse anything that comes off the car. This means you’ll need to pick up new U bolts, new front spring mount bolts, new shocks, new shackles, and in my case, new bump stops.
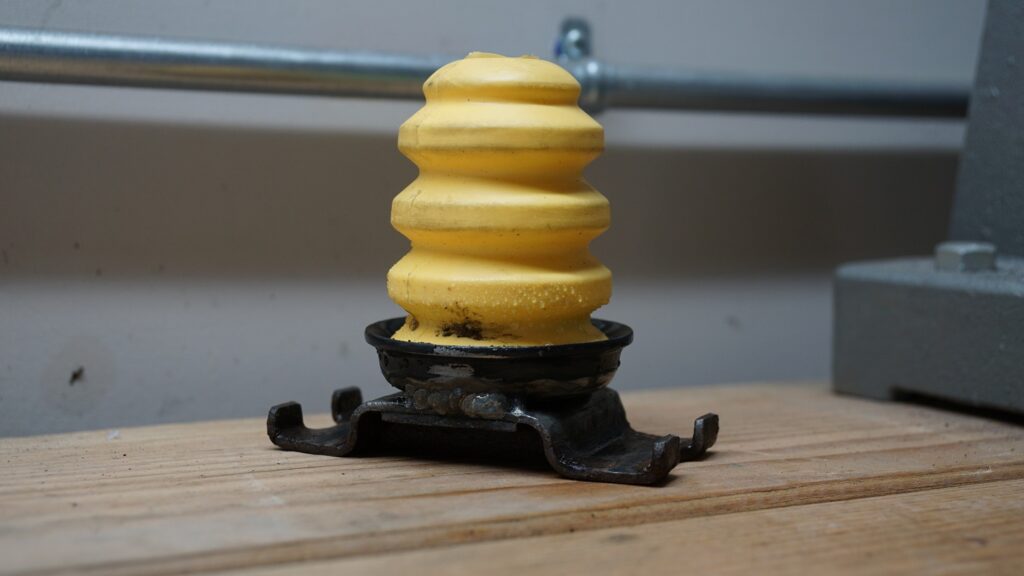
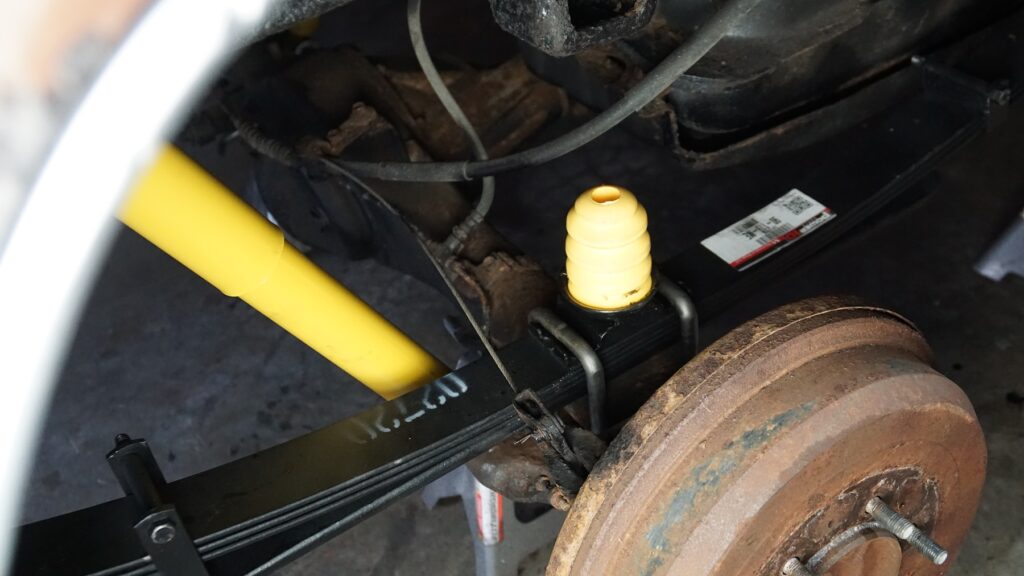
Speaking of bump stops, this was an additional obstacle I had to navigate when changing out my 4Runner’s suspension. The original bump stops had long since departed the upper spring clamp brackets. Toyota no longer sells the original bump stop/spring clamp piece (Toyota part number 48306-35080), so I had to create my own.
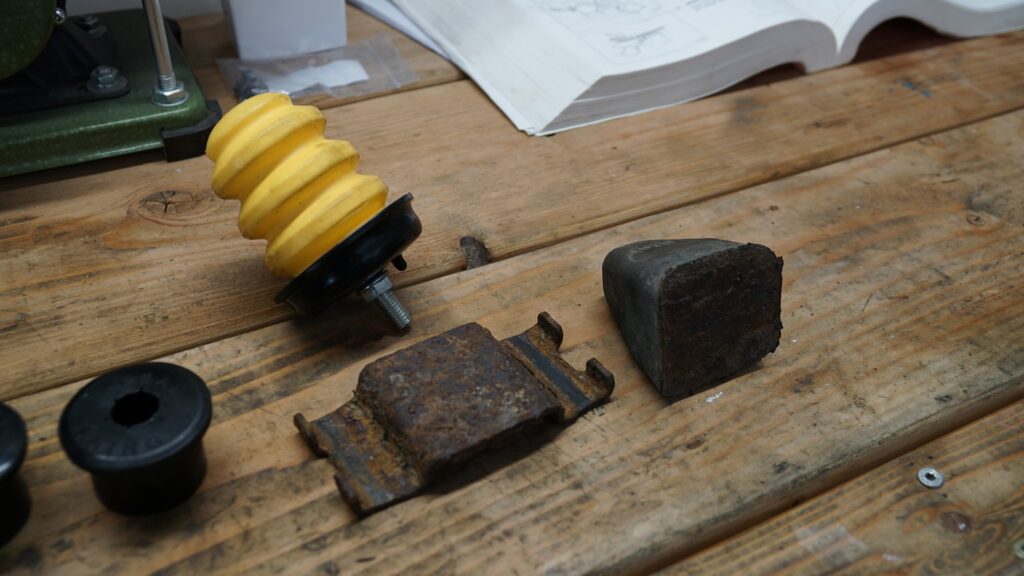
I have MIG welder so fabricating a custom bump stop wasn’t too difficult. I used a flap disc to smooth off the bottom of the new bump stops, then ran a couple of weld beads securing it to the top of the spring clamp.
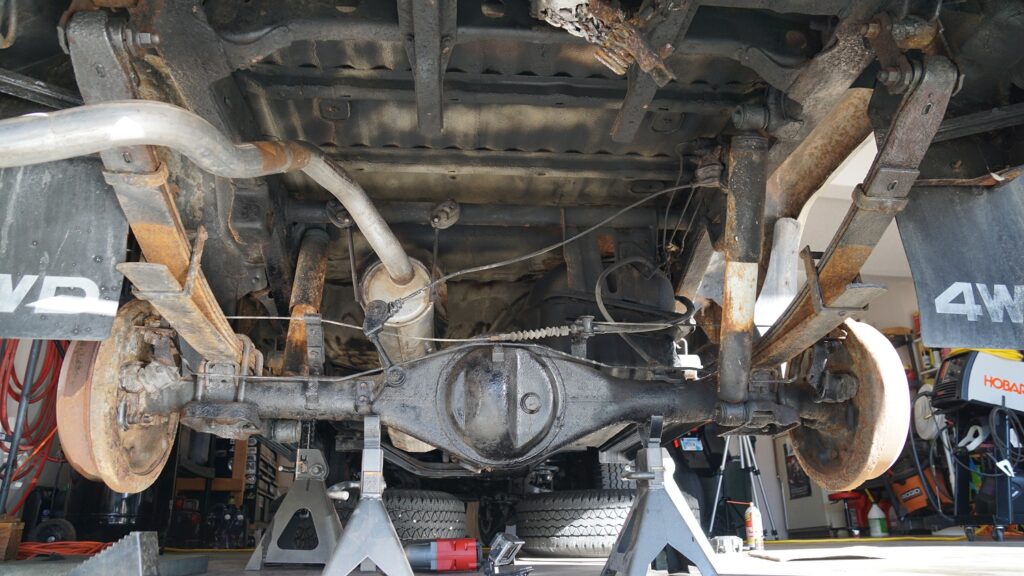
Removing the old springs was a pain because the front mounting bolts were siezed to the internal spring bushings. Whipping out the cutoff wheel made quick work of troublesome bolts. From there, the old springs dropped right out.
Undercarriage makeover
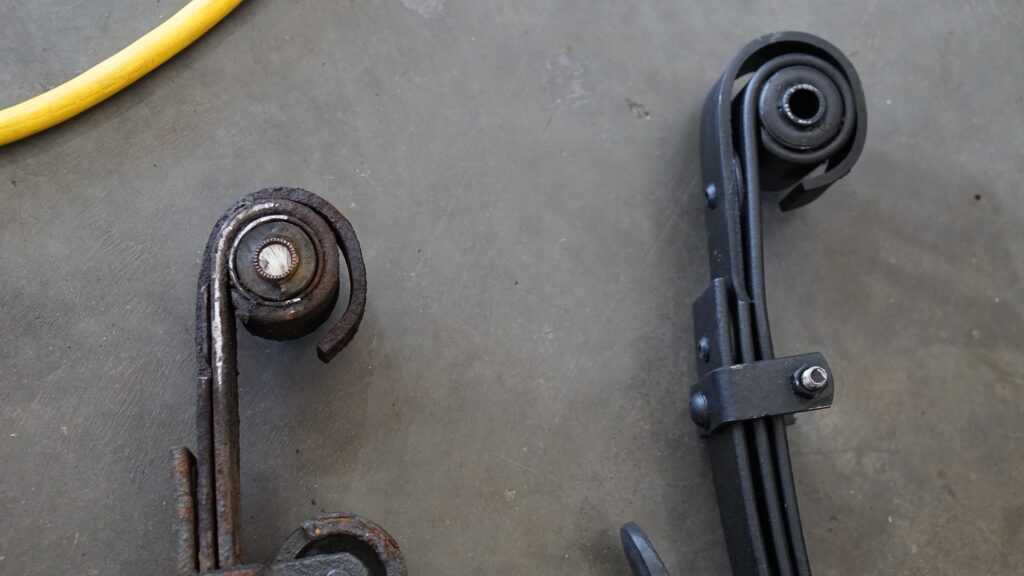
Installing the new springs was straight-forward thanks to new mounting hardware used throughout. This is where a little extra money spent up front saved me a ton of hassle.
With the new suspension installed, the rear of 4Runner sits much higher than before and the underside looks decades younger. This endeavor cost about $550, which is not small change. However, then end result gives you much more confidence in the truck’s rear end.

Unfortunately, at the end of this repair, the 4Runner showed me it had one more surprise up its sleeve. Be sure to watch the end of the video, because it looks like this 4Runner will be taking up a garage spot for the foreseeable future.
Caleb
I’m wondering if you have the dimensions for the U bolts you got? I’m having a hard time looking for the right size. Thanks
Hoss
Zuk
I did a Zuk on mine with coil springs
Super easy and less costly
caleb
please write for the autopian. i miss your blogs from the old german lightening website
Cody
Hi I am wanting to restore a 95 toyota 4runner, first and foremost it needs a new head gasket. It’s the classic 3.0 v6. And advice on what I should do to get started? I watched a couple of your videos. Is it necessary to have the cylinder heads machined? If so do you have a recommendation? I know my 4runner has at least 1 bad lifter as well. I would like to resolve the these issues at the same time.