
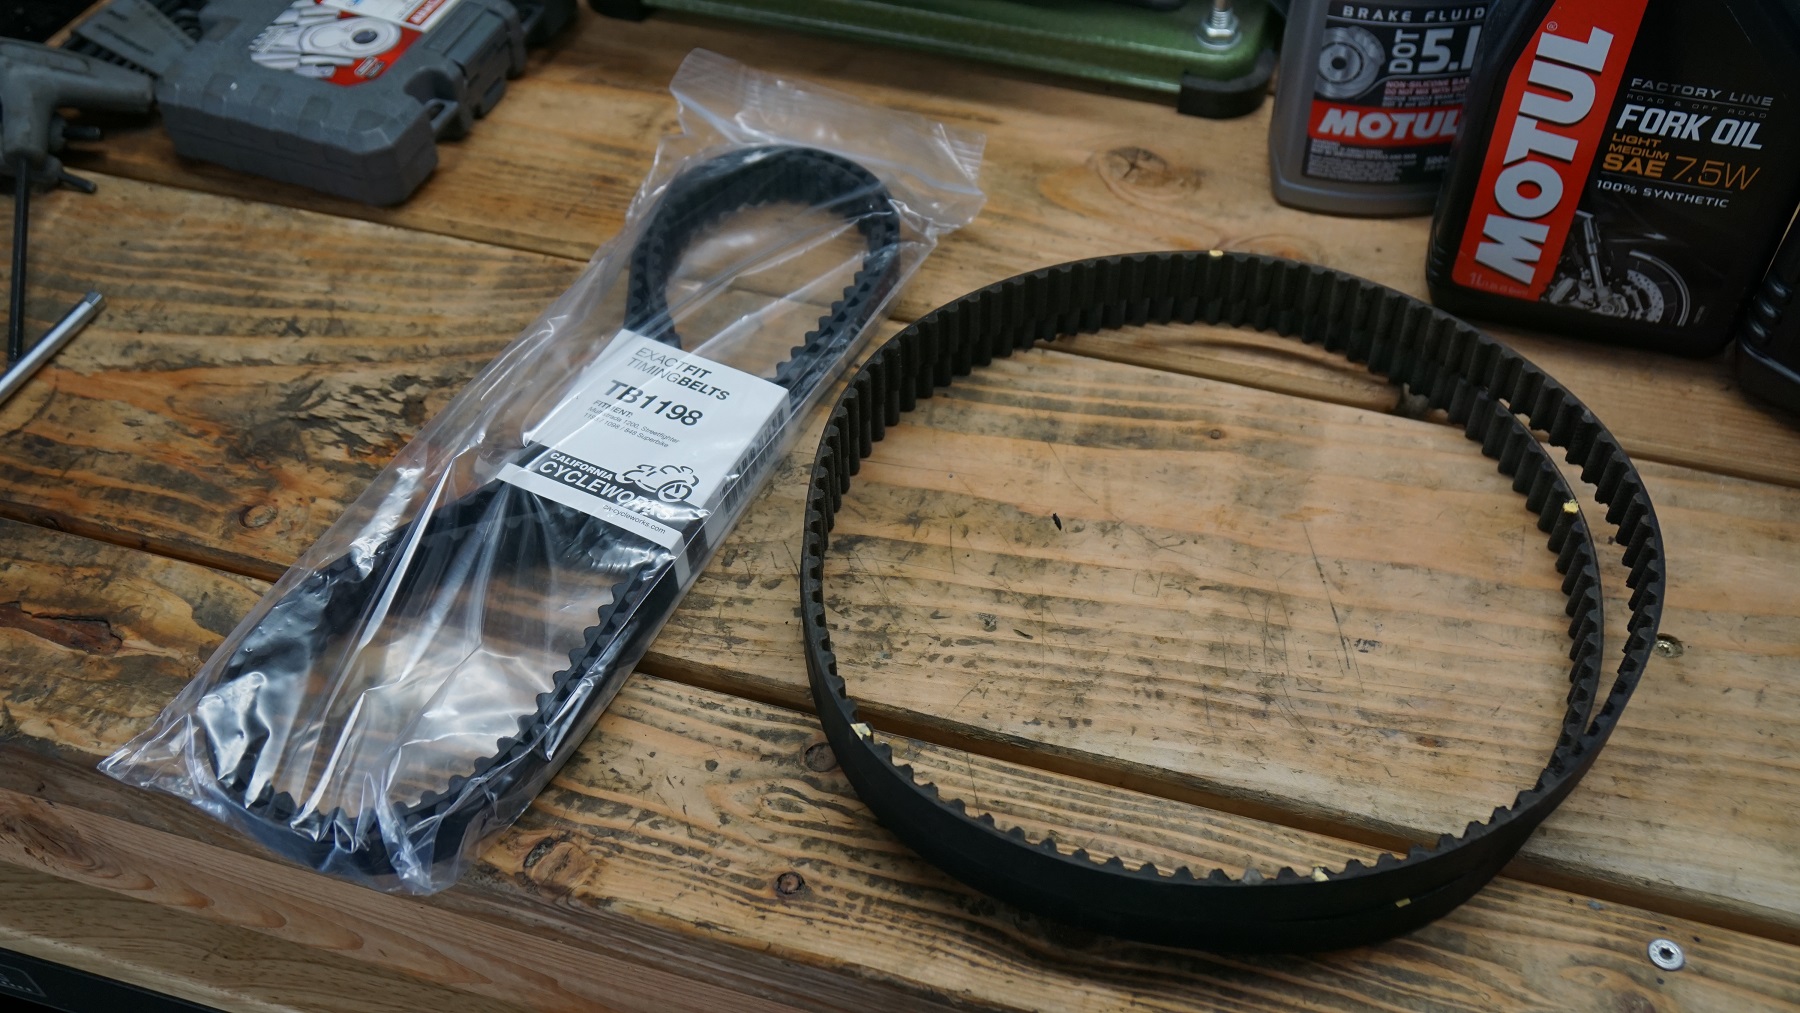
At the heart of nearly every Ducati are a pair of reinforced rubber belts that keep the internal engine parts in synch with one another. You don’t hear them or see them, nor do they give you an indication when reaching their expiration date. That’s why they have a replacement schedule of every 5 years or 15,000 miles, whichever comes first. If the belts aren’t replaced on schedule, they can fail which equates to a ruined engine. This isn’t a maintenance item you want to skip!
While there aren’t any special tools required to perform this task, you will need to grab a new set of belts at the very least. You should also consider this as an opportunity to clean the bike’s engine, inspect or replace the spark plugs, as well as clean or replace the air filter.
- Timing Belts (Qty Req: 2): https://ca-cycleworks.com/tb1198.html
- Spark Plugs (Qty Req: 2): https://amzn.to/3lyQF0k
- Engine Air Filter (Qty Req: 1): https://amzn.to/2SNixl8
- Motorcycle cleaner: https://amzn.to/2FMwwEG
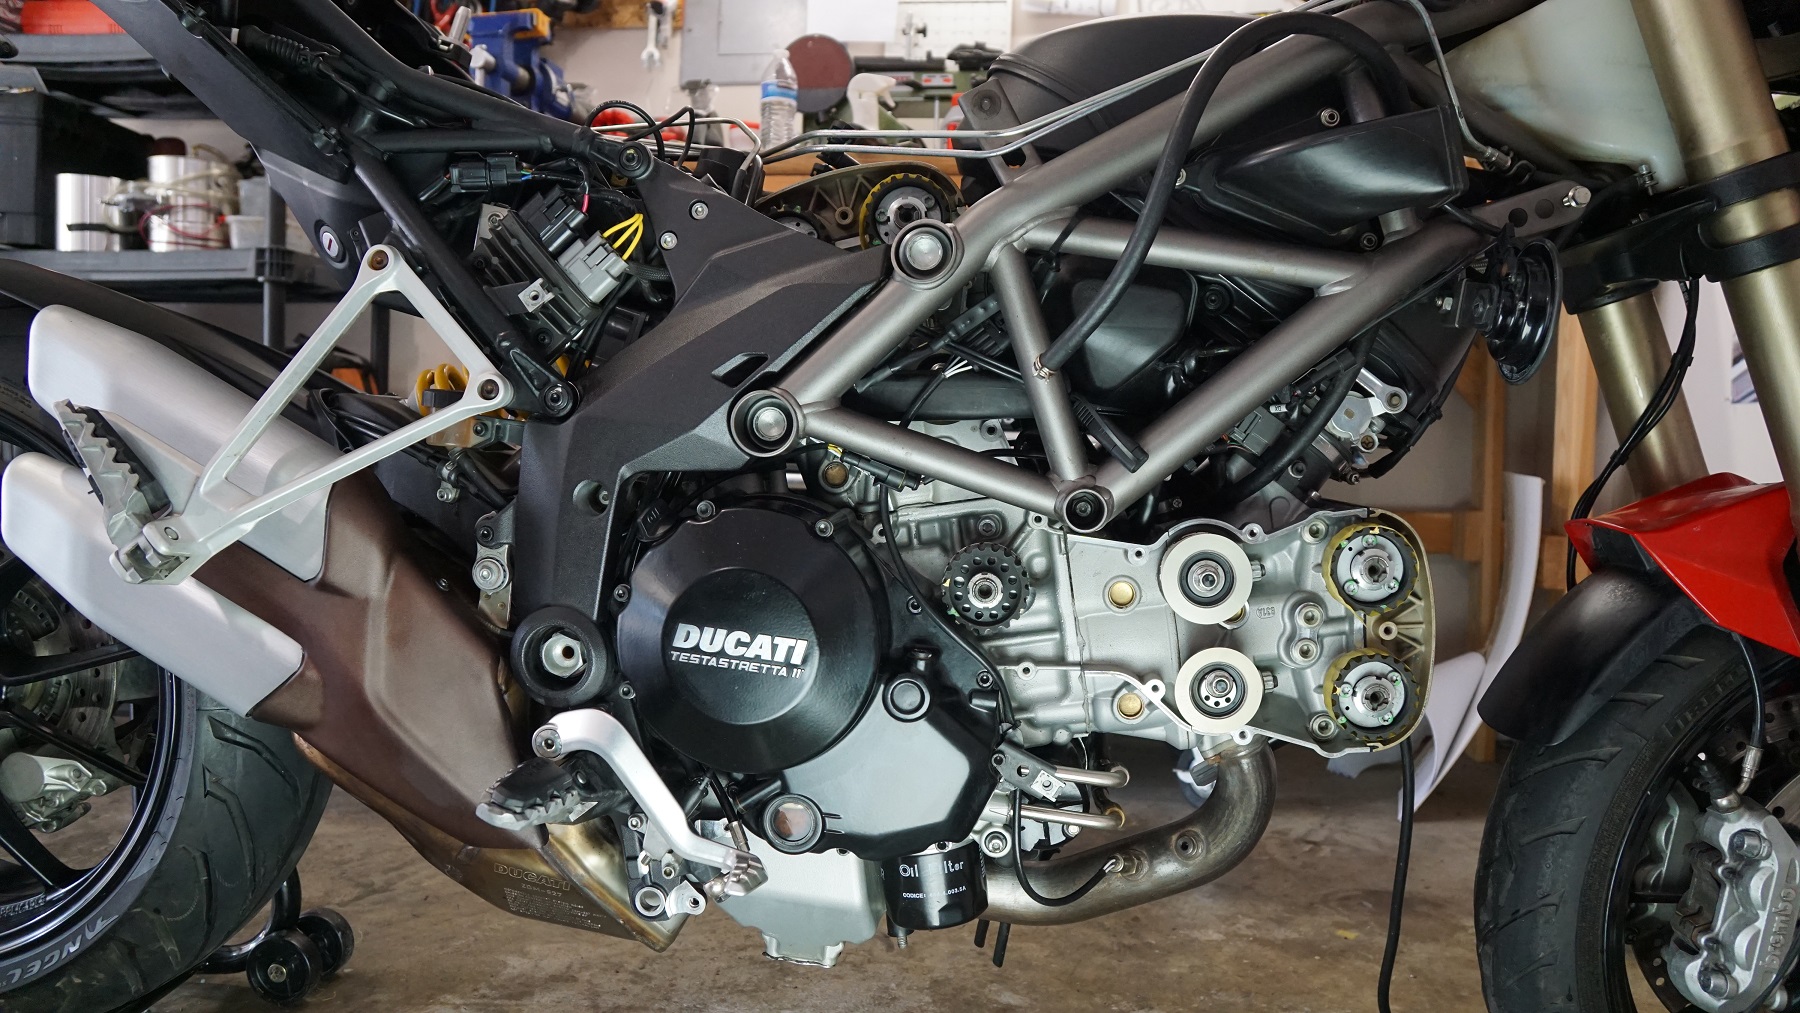
Replacing the timing belts on the Multistrada 1200 necessitates removing most of the bike’s bodywork as well as the fuel tank (see Video 1). I’d recommend riding the bike until there is very little fuel remaining in the tank so you don’t find yourself juggling an oddly shaped, 40-pound petroleum bomb around the garage.
While the job itself is not necessarily difficult, there are a few details you’ll want to make sure you get right:
- Bringing the engine to Top Dead Center (which is determined by aligning the crankshaft sprocket indentation with the engine casing indentation – see Video 1 for example)
- Before removing the old belts, use a paint pen to place a mark on each sprocket that references a single belt tooth aligning with a single sprocket cog. This allows you to transfer the reference marks to the new belts so that they can be aligned with the correct sprocket cogs upon installation. (See Video 1 for example)
- Transfer the reference marks you made on the old belts to the new belts. (See Video 2 for example)
- Remove the eccentric belt tensioners before installing the new belts (much easier this way!)
- Install the new belts (vertical cylinder first), making sure to align the markers you made on the belts to the markers you made on the sprockets. HINT: Use a pair of 45-degree long-nose pliers to rotate the vertical cylinder’s intake cam into position as it is under compression and won’t want to stay put. (See Video 2 for example)
- Install the belt eccentric tensioners and rotate them counter-clockwise to set belt tension. Use a frequency tuner app on your phone to verify the correct belt tension. (See Video 2 for example)
- For Android users, I recommend this tuning app: https://play.google.com/store/apps/details?id=jp.gr.java_conf.kotokotobokan.onpa2&hl=en_US&gl=US
Frederick
Hey Peter,
I’ve just noticed something a bit odd on my newly acquired 2012 Multistrada. There seems to be a gap between upper and lower vertical belt outer covers. This gap seems to be at least 4mm. When running, I can see belt operation and one of the tensioners.
Looking into forums, although very few, some owners seem to exhibiting the same. Can you say if you noticed the same on your bike?
Regards,
Frederick
Peter Monshizadeh
Hi Frederick,
My guess is that the timing covers were installed incorrectly. They have to overlap in a certain way (i.e. installed in a particular order) and if they’re not, there will be a gap like you’ve described.
Jeff
My 2010 does as well. Just did the timing belts for the 1st time on my new to me bike with only 4,500 miles on it. The gap was there before I took the covers off. No adjustment to get them closer together was possible at reassembly. The gap on mine was about maybe 2mm.
Mark McKenzie
Thanks for the write-ups and videso. So no need to lock the crank into position? I’m assuming it has a enough pressure on it to keep it set. I just notice a lot of crank lock tools available.