Even a Lexus needs attention at times
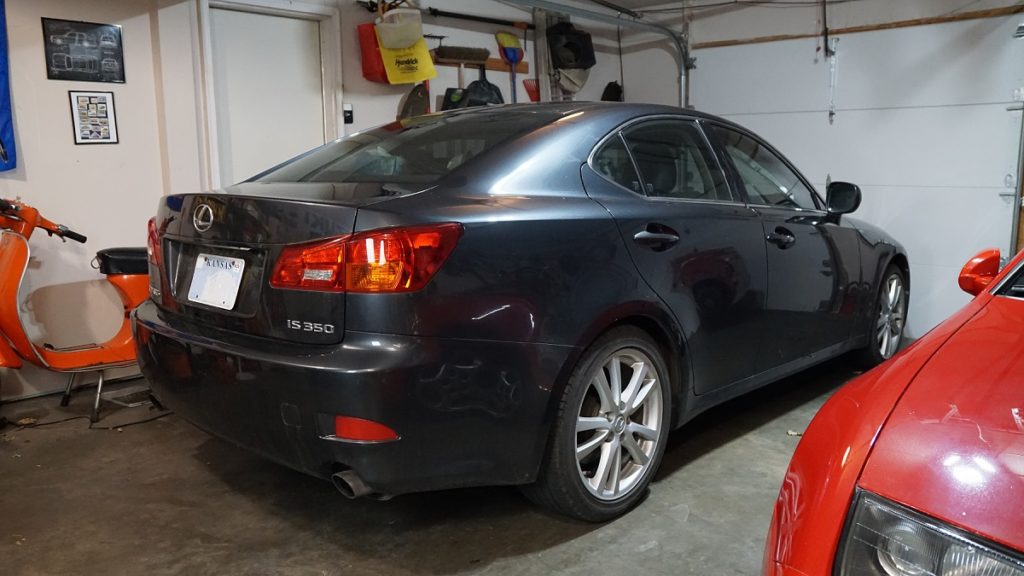
Struts are used to dampen a spring’s movement in a car’s suspension system. Without struts, a car would never stop bouncing as it moved down the road. These important parts take a beating and are often ready for replacement around 100,000 miles. In this post, we’re going to see what is involved when replacing the rear struts on a second-generation (2006-2013) Lexus IS.
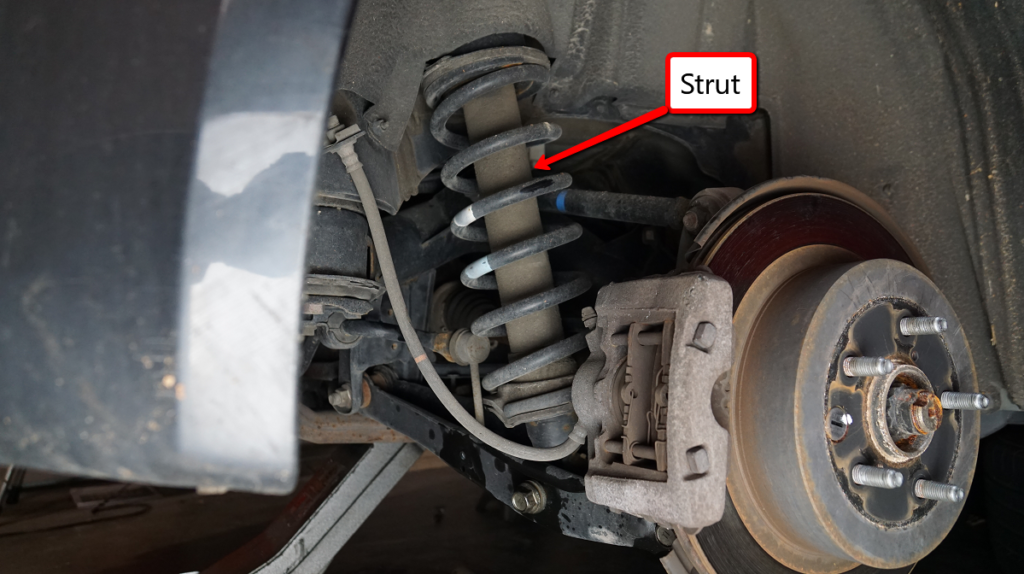
The first thing to consider is that struts should be replaced in pairs. The best practice would be to replace the struts at all four corners, but sometimes this isn’t financially viable. On the Lexus featured here, the right rear strut was leaking oil while the left rear wasn’t. Since both parts have experienced the same amount of usage, they will typically fail in a similar time frame so you’re better off saving time and replacing both at once.
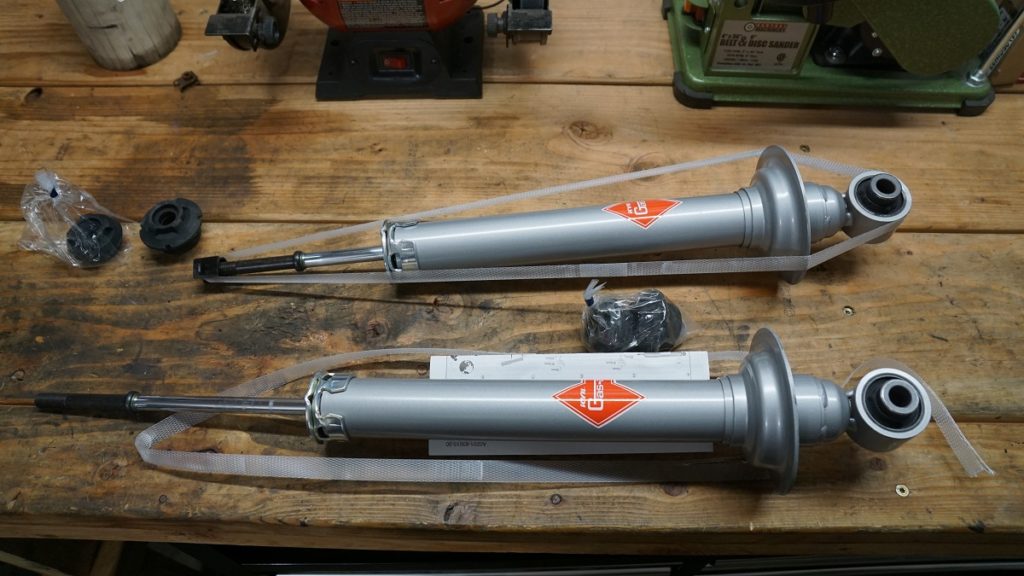
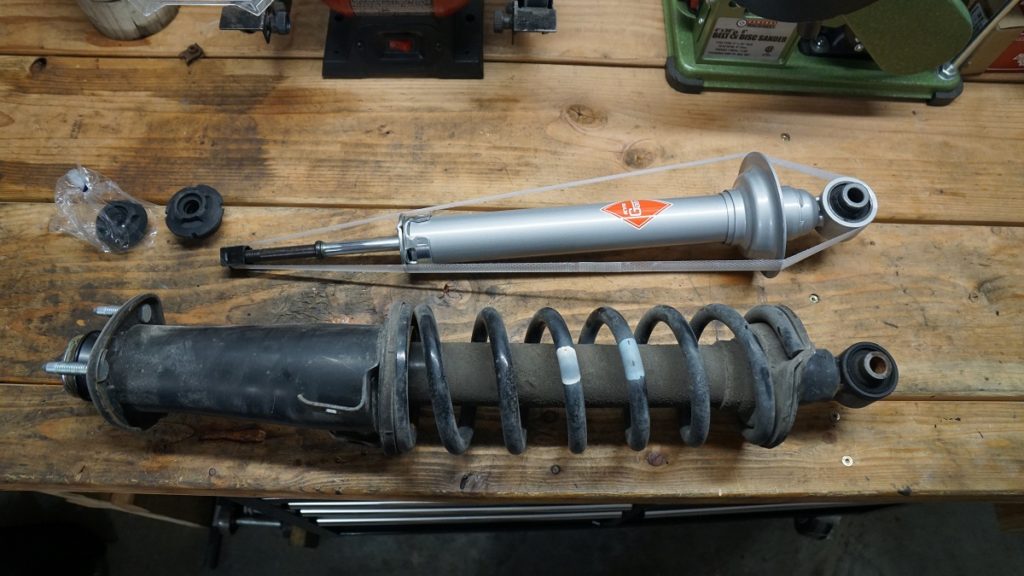
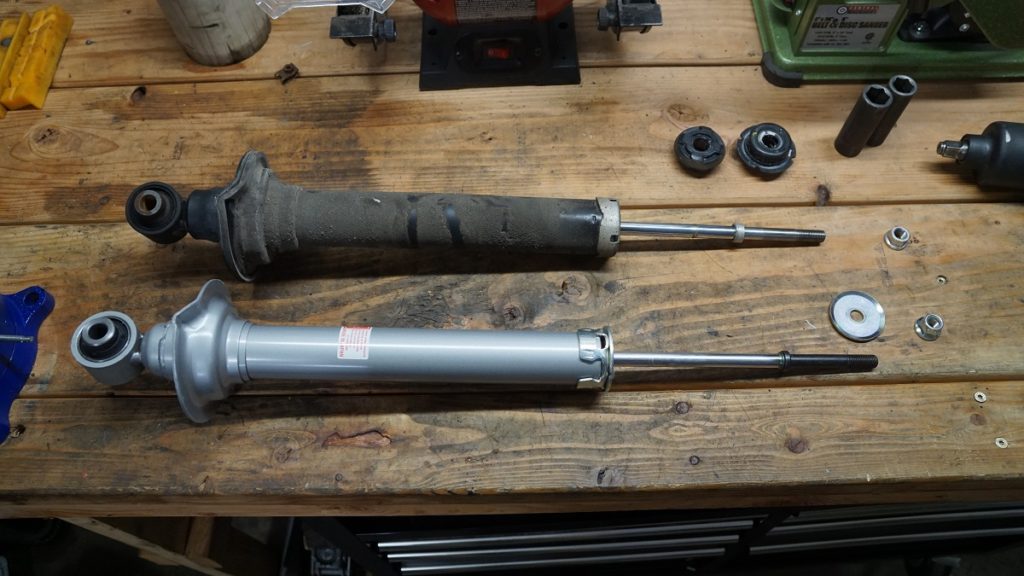
Next, you should consider ordering struts from a reputable manufacturer. You will rarely come out ahead with inexpensive or unproven suspension components. Original parts, such the Lexus-branded struts for this car, were prohibitively expensive. However, high-quality KYB units (KYB part number 551132) were sourced for under $80 a piece – a fraction of the Lexus brand cost.
To replace struts, you’ll need a set of spring compressors in addition to all the typical hand tools and jack stands needed when doing most any mechanical vehicle repair. Alright, now it’s time to replace the struts.
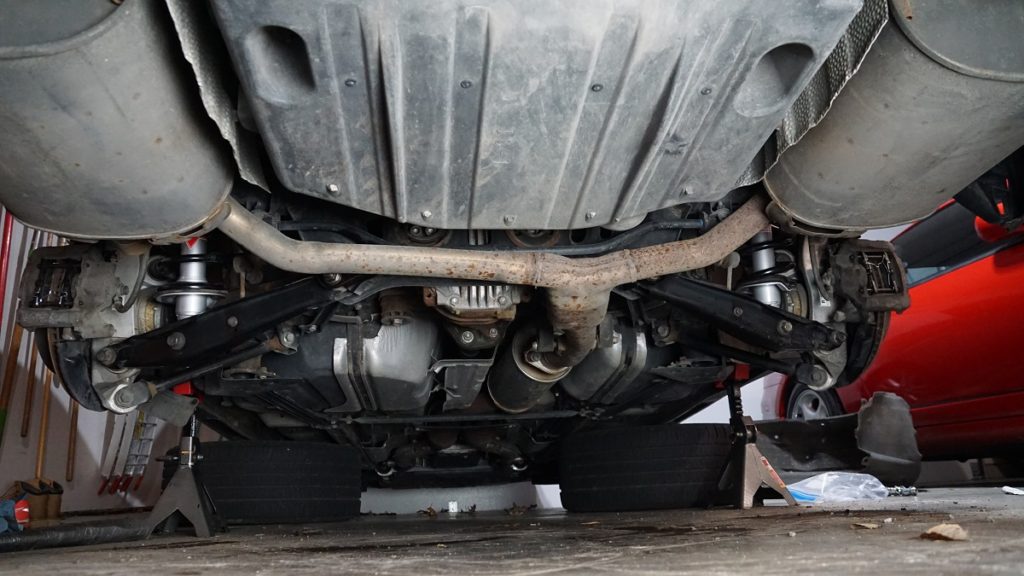
Out with the Old
Chock the front wheels and raise the rear of the vehicle with a hydraulic floor jack placed in the center of the rear differential housing. Place jack stands under the car to secure it in a safely raised position.

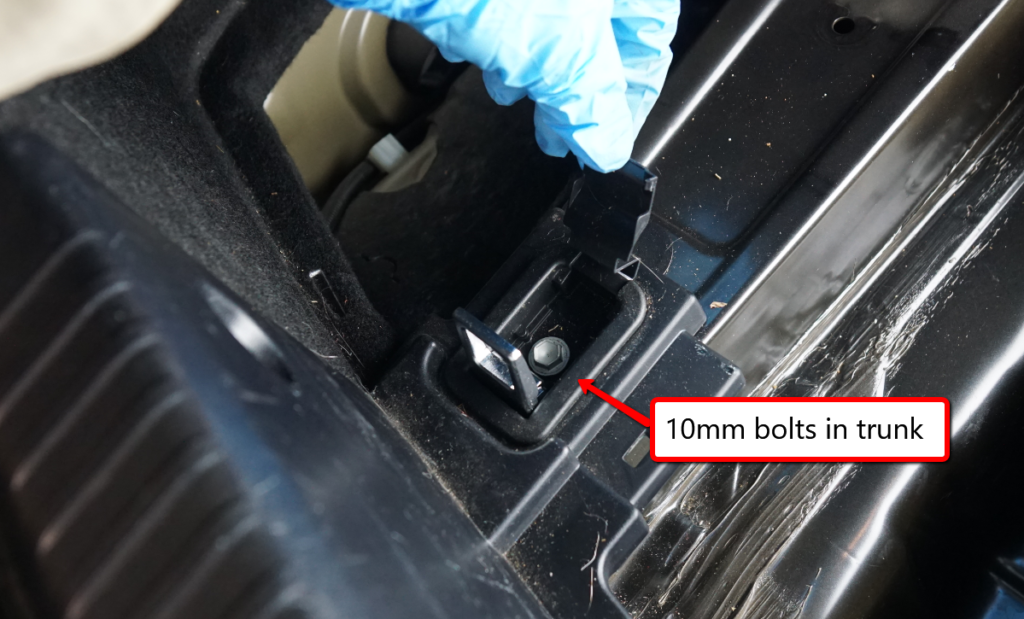
Remove the rear wheels and trunk interior pieces. The interior panels are secured with an assortment of plastic pop rivets and 10mm bolts.
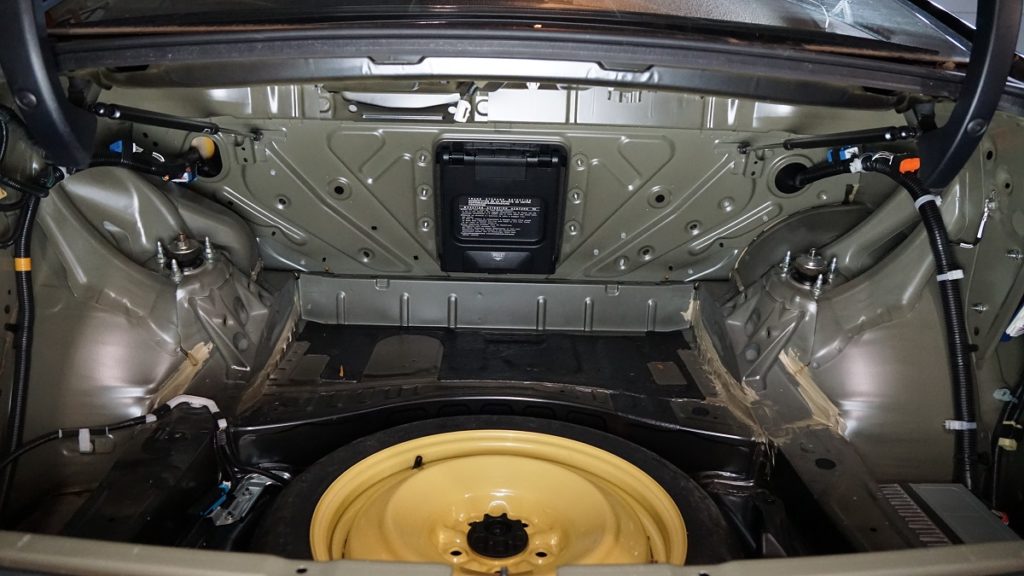
Remove the inner wheel well liner.
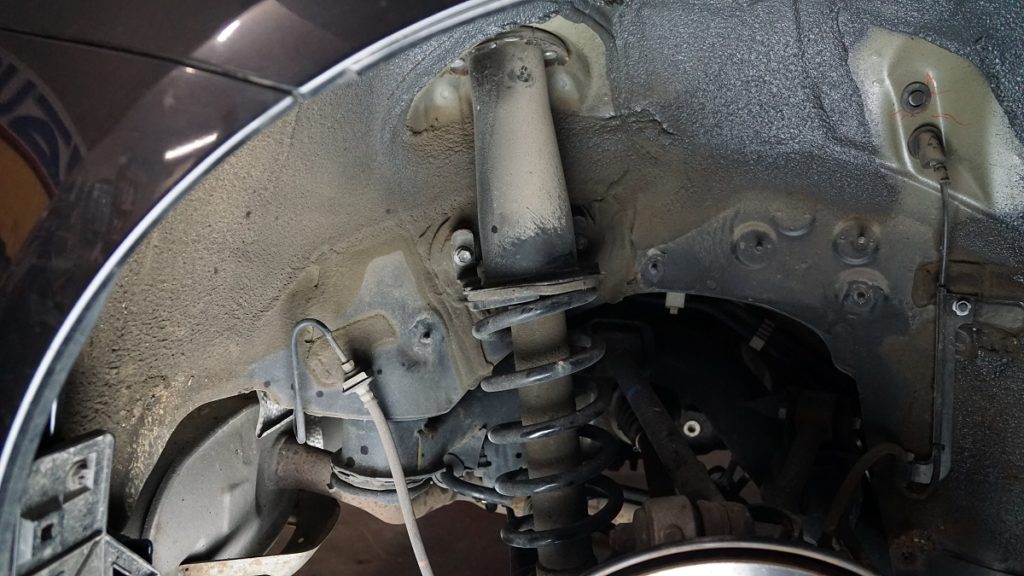
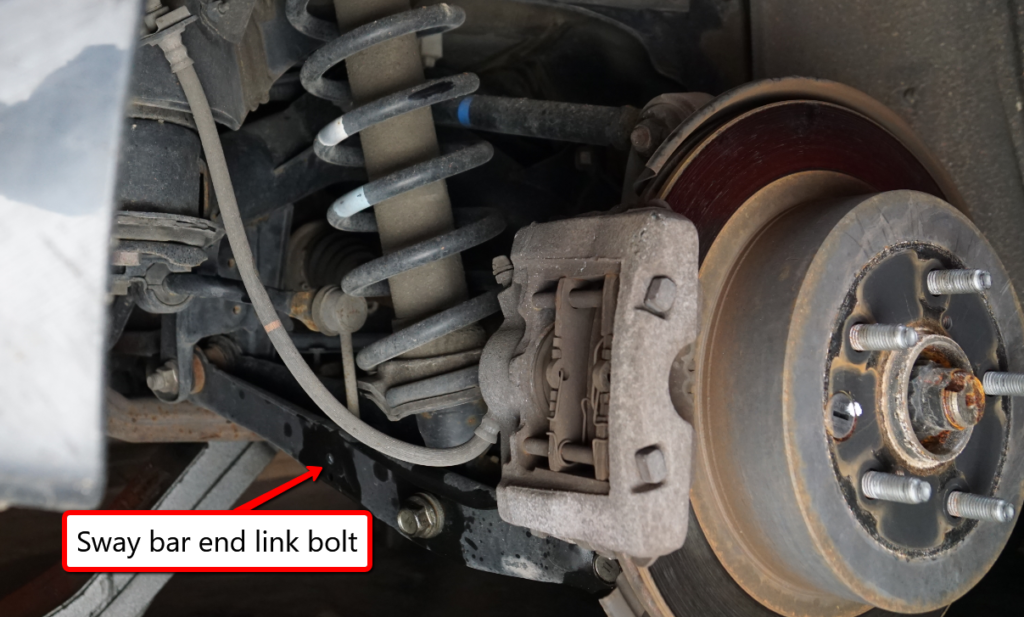
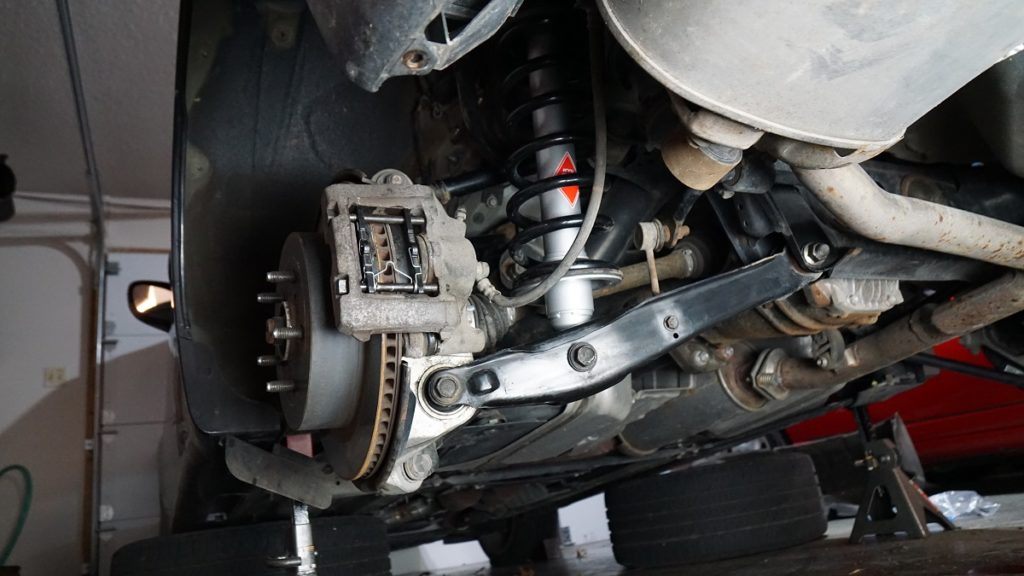
Next, Remove the lower sway bar end link bolts. Doing so allows the rear control arms to move independently.
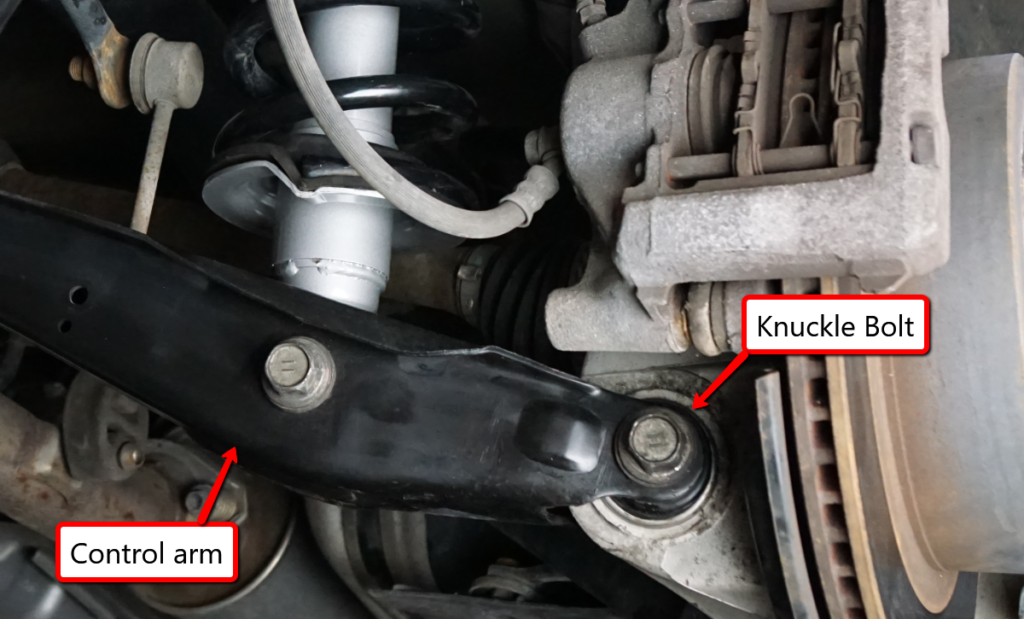
Support the lower control arm with the hydraulic jack and remove the lower knuckle bolt. Pull the knuckle out of the control arm while keeping the lower control arm supported with the jack.
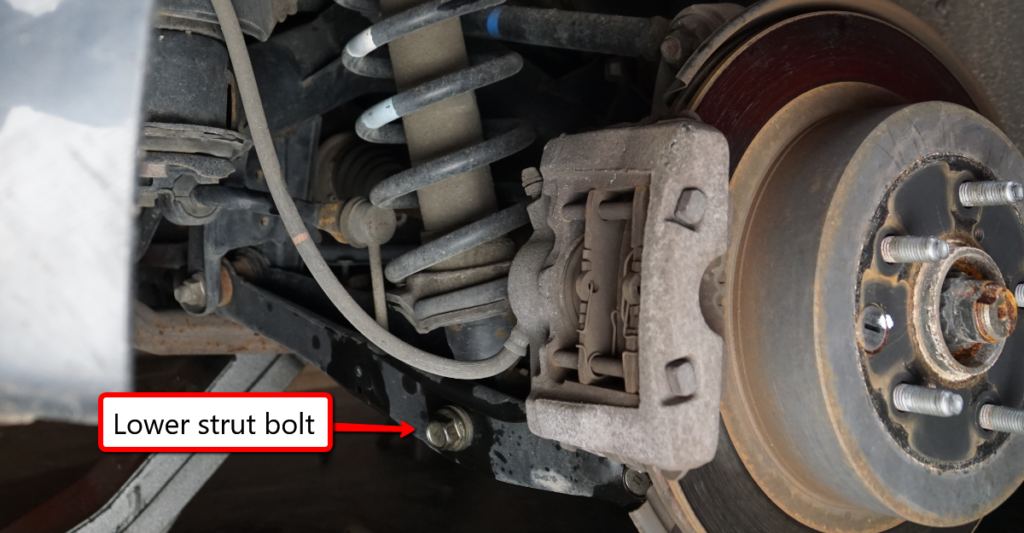
Now, remove the lower strut bolt and then lower the jack so that strut is no longer under compression. With the compression removed, lightly support the strut with the jack.
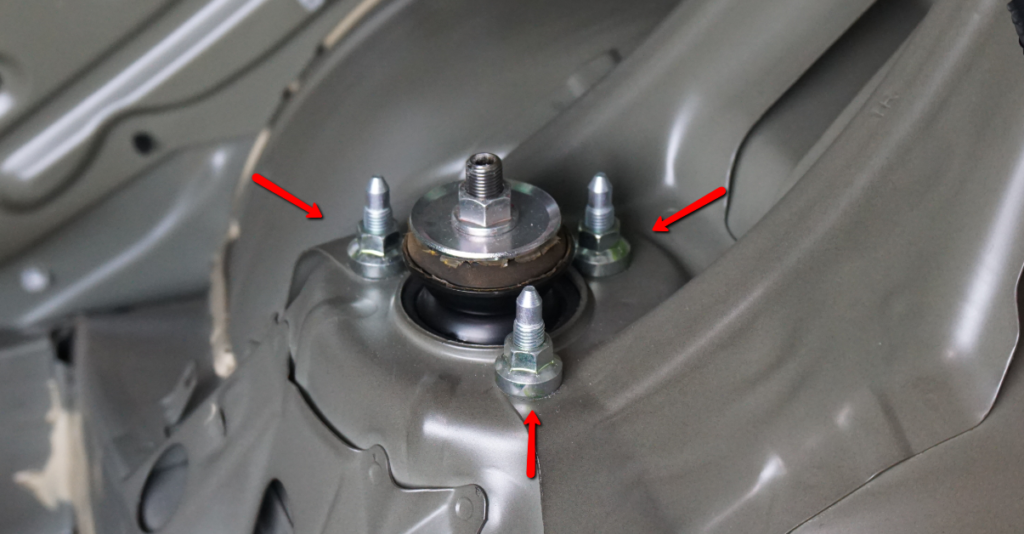
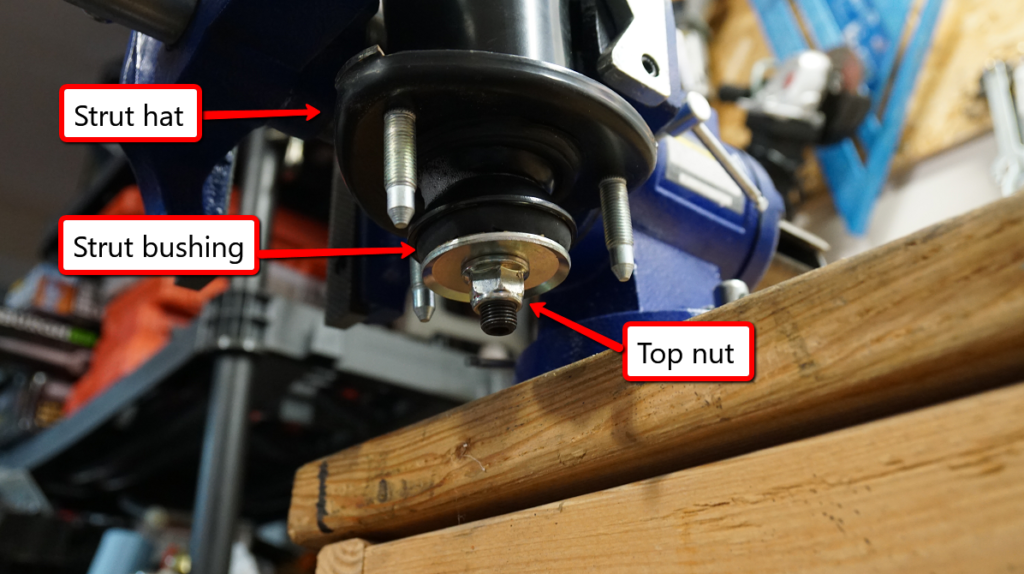
From inside the trunk, remove the three top nuts that hold the strut in place.
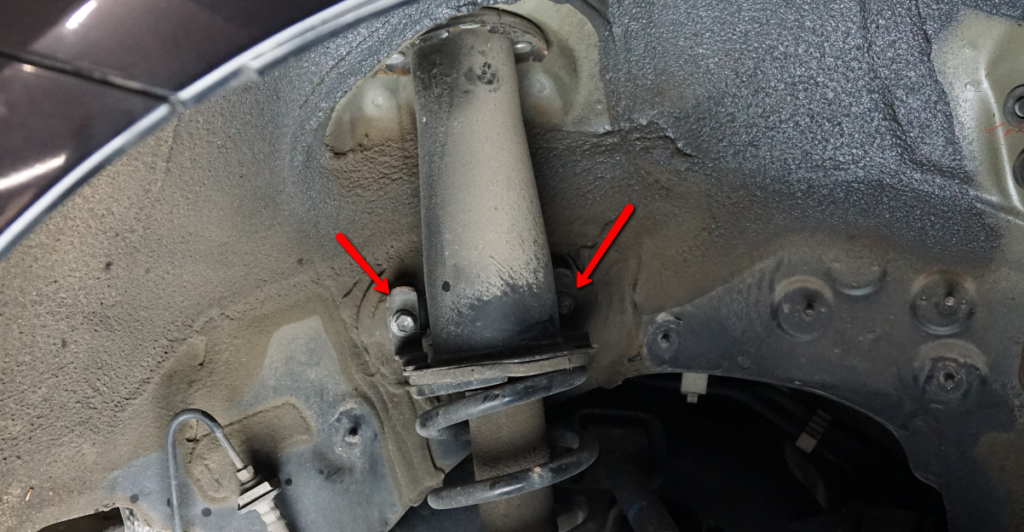
Remove the two bolts that hold strut to inner wheel well. Lower the jack and remove the strut.
To the Bench!
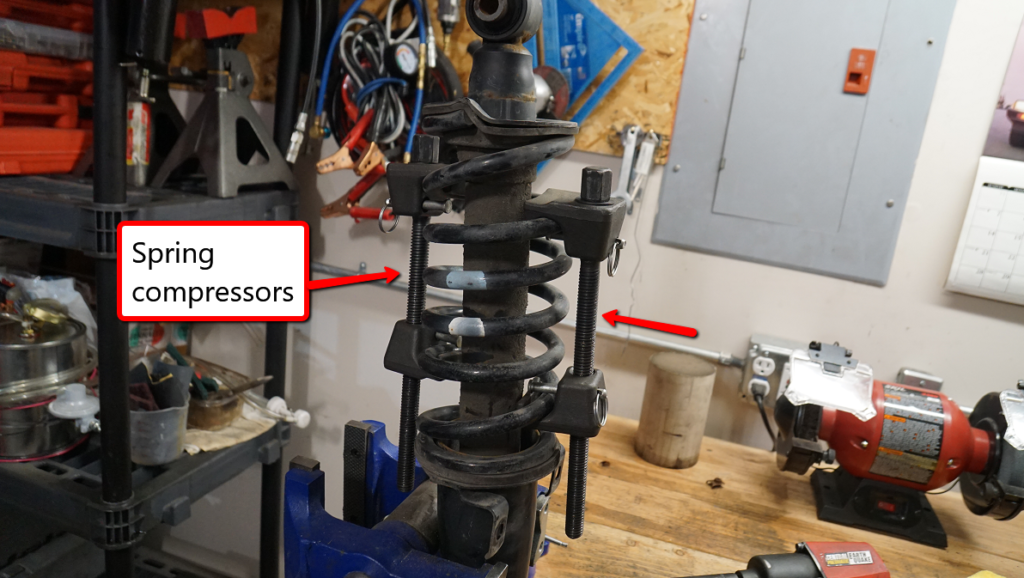
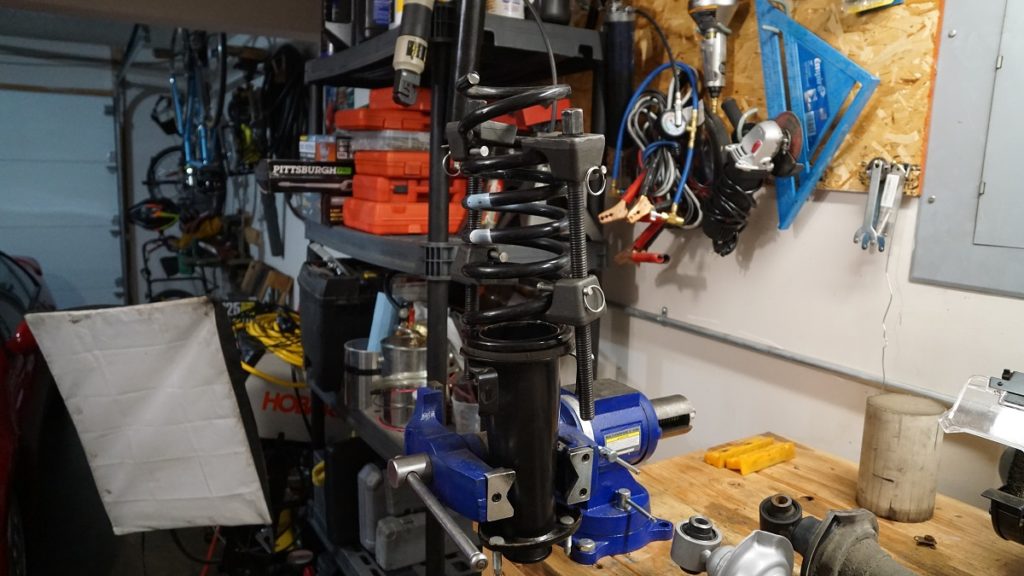
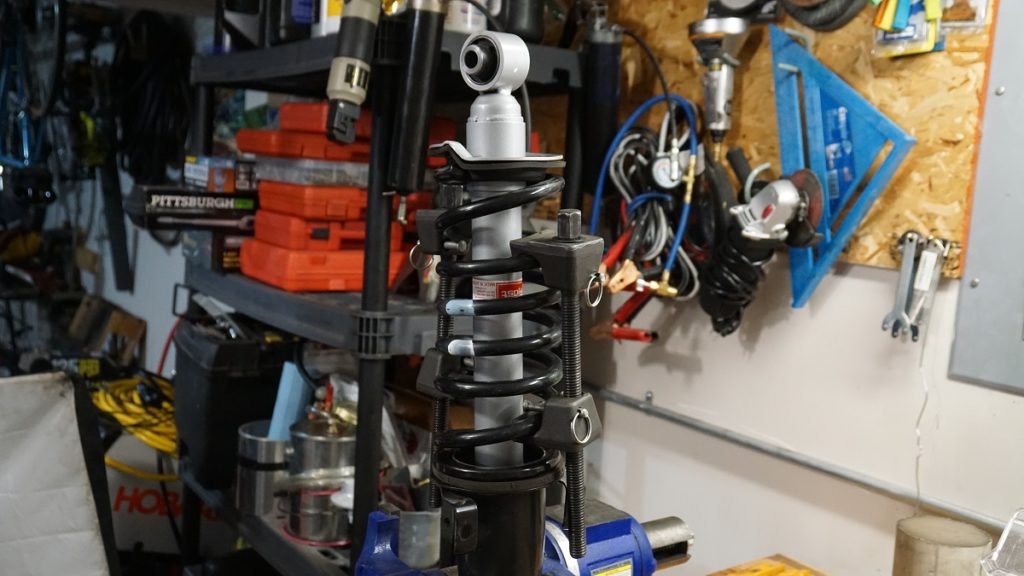
Place the strut in a bench vise (or similar) to hold it stationary. Install the spring compressors to take the pressure off the strut rod. Remember, exercise caution during this step as a spring under compression can be dangerous if it were to slip out of the spring compressors.
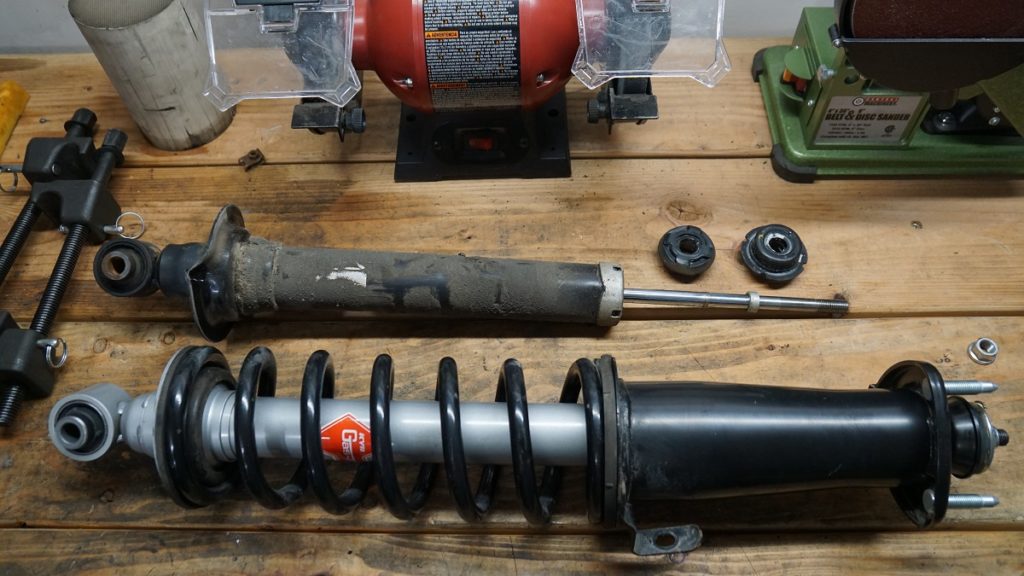
Remove the top nut of the strut (I used an electric impact drill) and pull the strut hat off the assembly. Pull the strut out of the assembly.
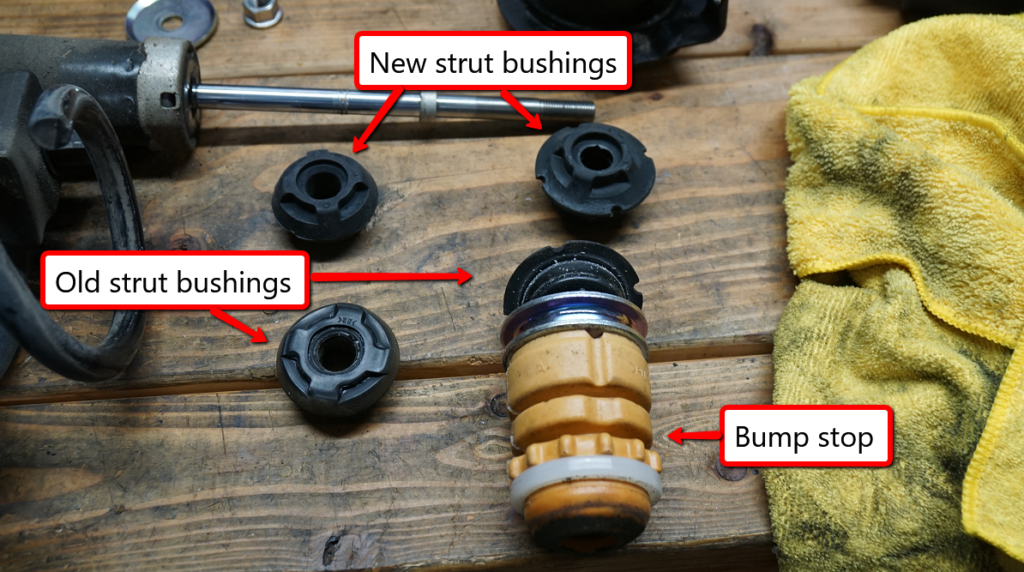
Replace the strut mount bushings on either side of the strut hat.
In with the New
Install all the removed parts in reverse order onto the new strut. Tighten the strut top nut to specification and then slowly release the compression from the spring compressors.
Install the strut in the car following the reverse order it was removed in.
Torque specifications: Knuckle bolt (118 ft/lb), Lower strut bolt (80 ft/lb), Wheel well strut bolts (15 ft/lb), Upper strut mount nuts (55 ft/lb), Strut top nut (13 ft/lb), Sway bar end link bolt (20 ft/lb), Lug nuts (76 ft/lb)
John K
Thank You for this!!! Well done. I’m a very experienced (amateur) mechanic, but went to do the rear on an ‘09 GS350 and was stumped a bit at a few quirks of multi-link suspension had me struggling to get the LCA sufficiently free.
I appreciate the time you take to help others; I try to do the same on other forums I frequent (and two that I help moderate.