Replacing front door speakers on a second-generation Mazda3 is difficult, but not impossible.
I’ve replaced plenty of auto speakers before so I didn’t think much of swapping the speakers out on a Mazda3. Usually the hardest part of the job is getting the door card off, but not this time around! This is because Mazda integrated a “riser” plate into the speakers, rendering them not a simple, direct swap for aftermarket speakers.
The purpose of the riser is preventing the speaker from interfering with the window track when the window is rolled down. You must retain this speaker offset if you want your windows to still work. There are aftermarket risers for the Mazda3 available, but there weren’t any available locally which was a problem for me. I wanted to get this job done now! So, I needed to improvise.
Finding the correct speaker
Before I get into how I improvised a riser, I want to bring light to a secondary challenge that arose during this job: determining the correct speaker size. I thought I knew the correct speaker size because Crutchfield’s vehicle speaker configurator (www.crutchfield.com) seemed like a reliable source for this information.
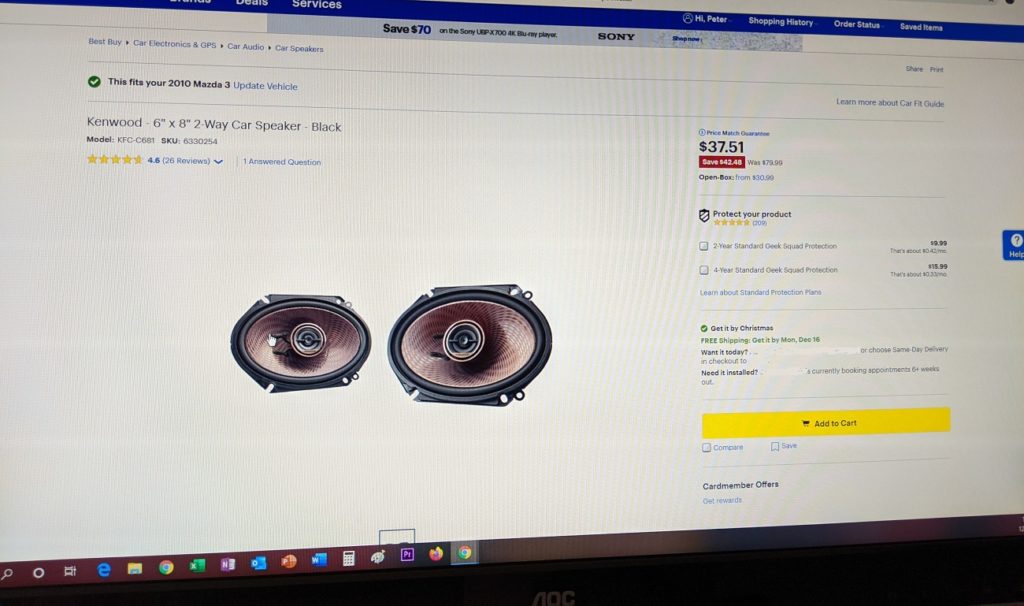
Unfortunately, their configurator steered me wrong; it convinced me buy a set of 5 1/4″ round speakers for the front doors. Once I had the front door panels removed, it was obvious that what I actually needed were 5×7″ oval speakers. Luckily, the local Best Buy had a set of 6×8″ Kenwoods for a great price, so I went out and bought a pair of those. Note: 5×7″ and 6×8″ speakers are often interchangeable as they share the same mounting dimensions.
Taking it apart
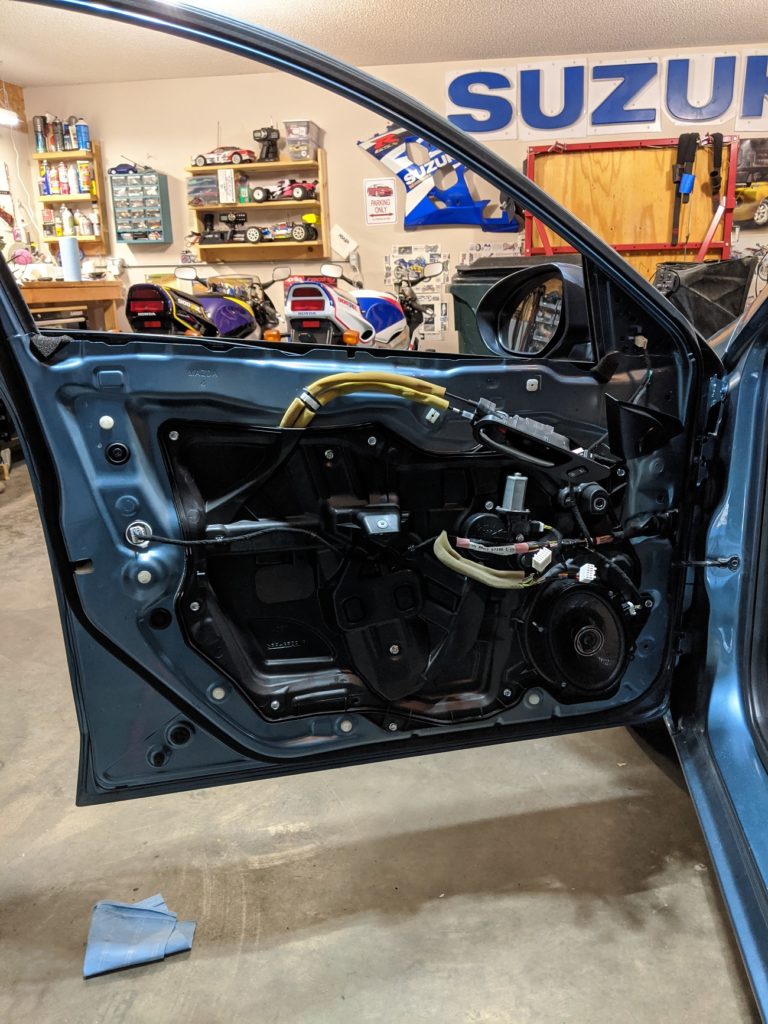
Now, back to how to replace the speakers. First, remove the door panel. Here’s a great instructional video on how to do this on a Mazda3:
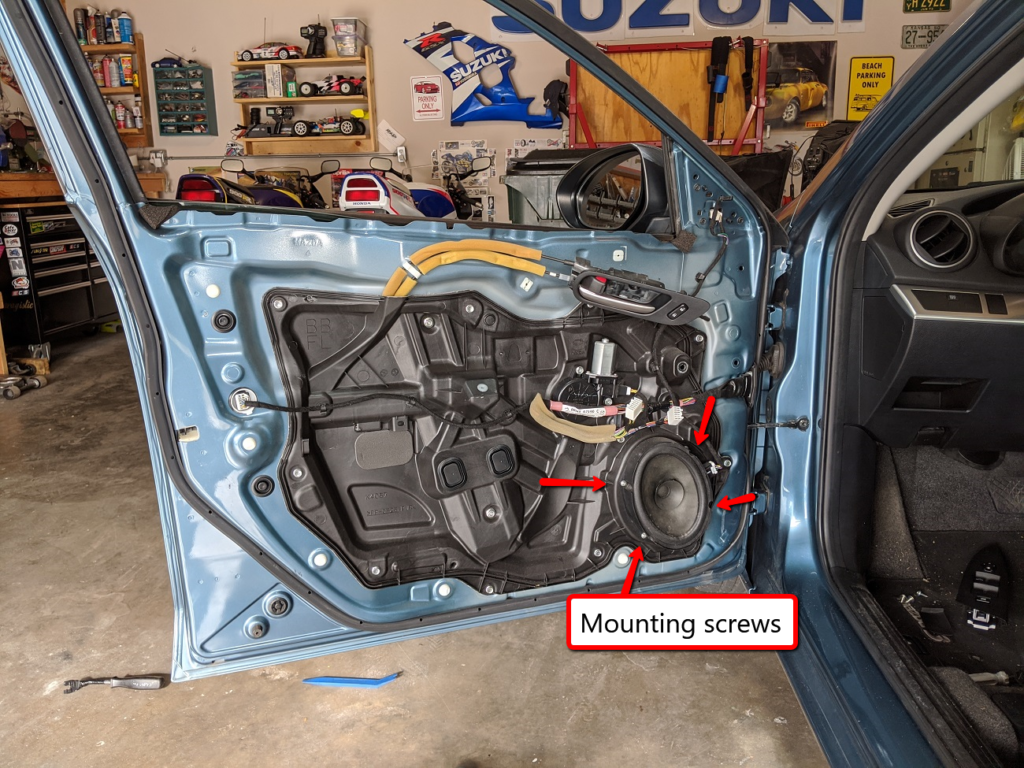
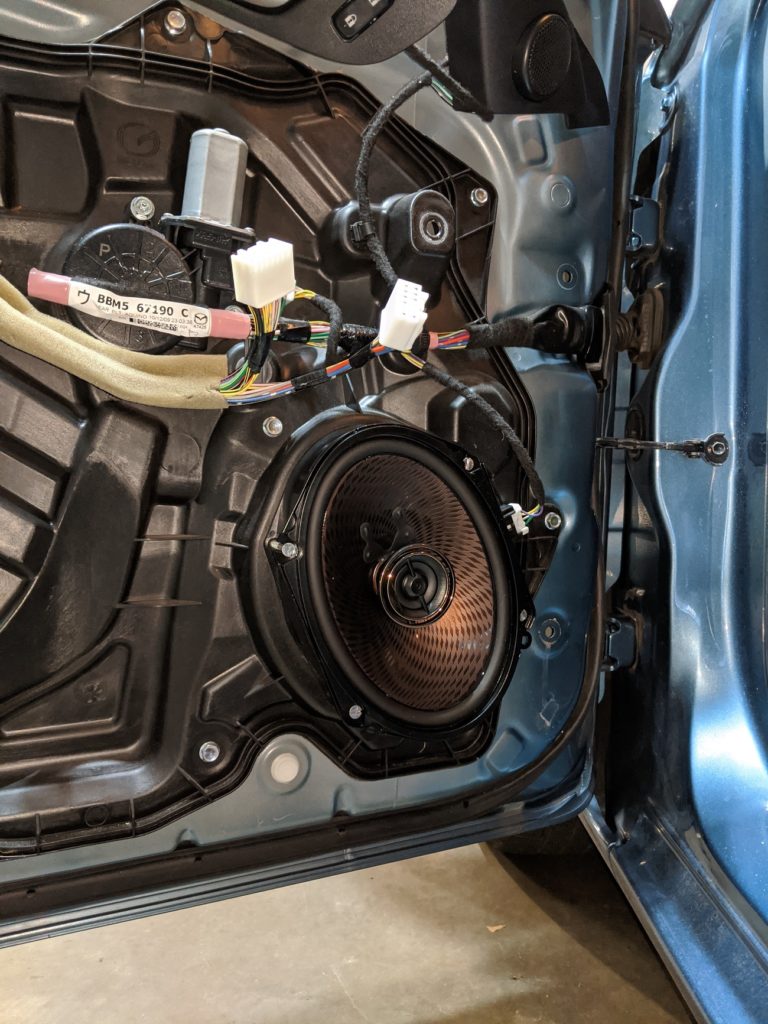
Now you’ll be able to see the speakers.
Unscrew the four screws holding the speaker in place and disconnect the electrical connector. The speaker will pop out of the door card.
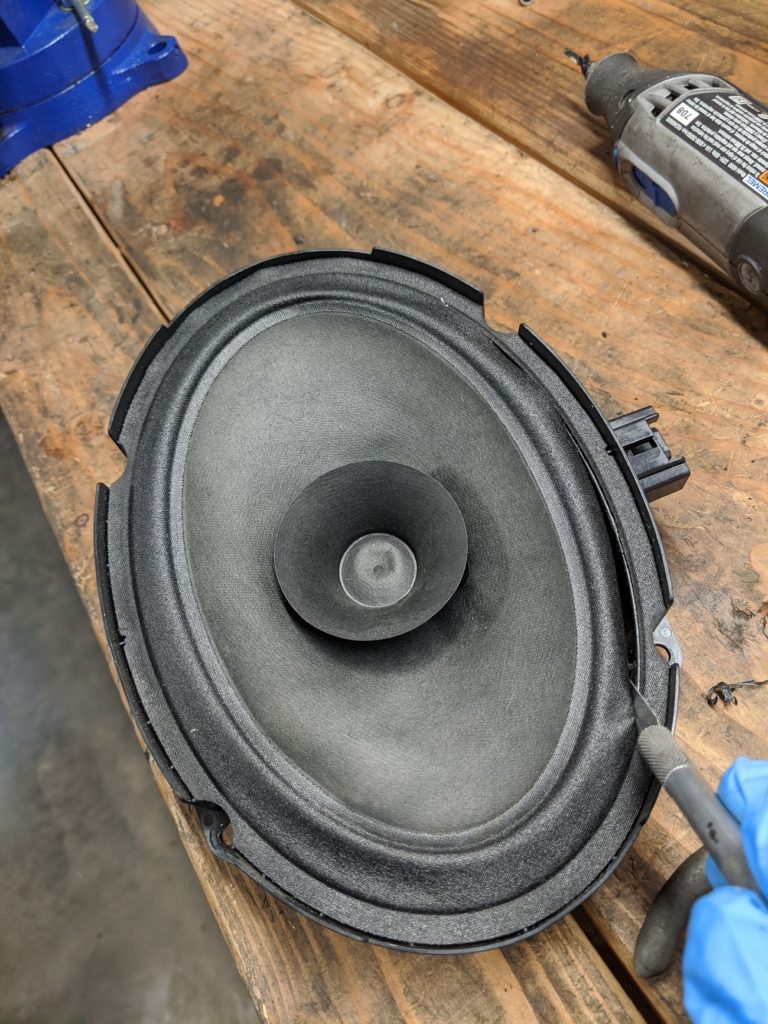
You can see that the speaker is a integral piece of the riser. We need to reuse the riser portion of the speaker. To do this, we’ll have to cut out the speaker. I used a Dremel tool with a carbide cutting bit to cut the “spars” that hold the speaker in place. It’s just plastic, so other cutting tools would probably do fine here as well.
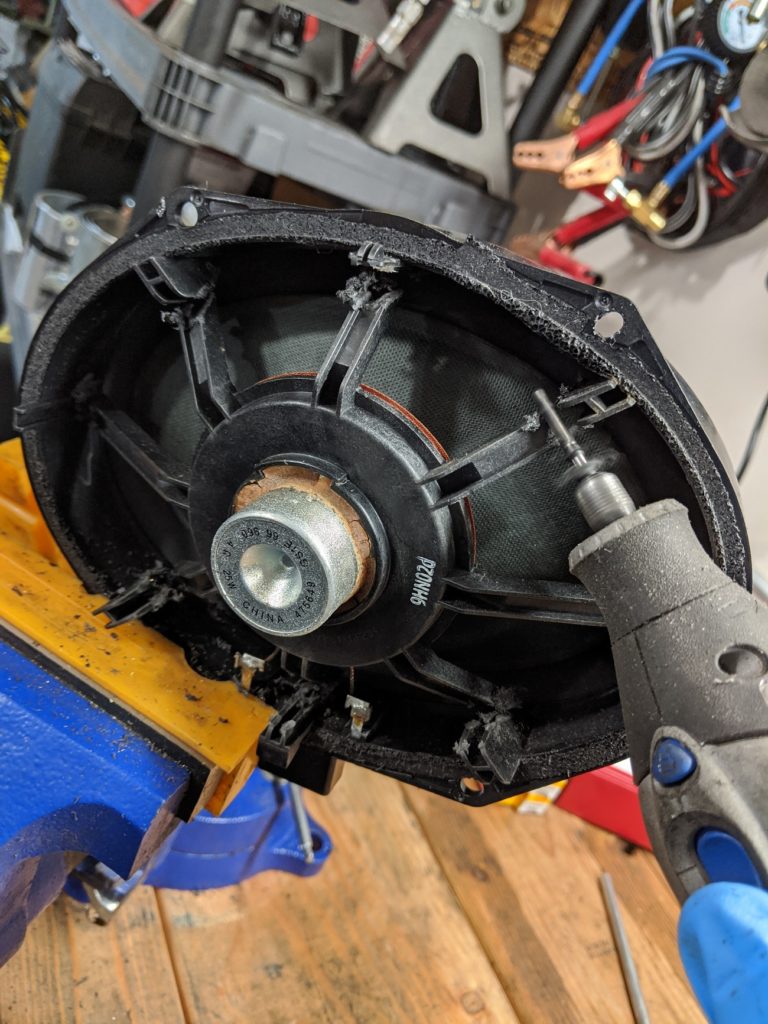
Next, use a sharp knife, such as an X-Acto blade, to separate the speaker cone from the riser.

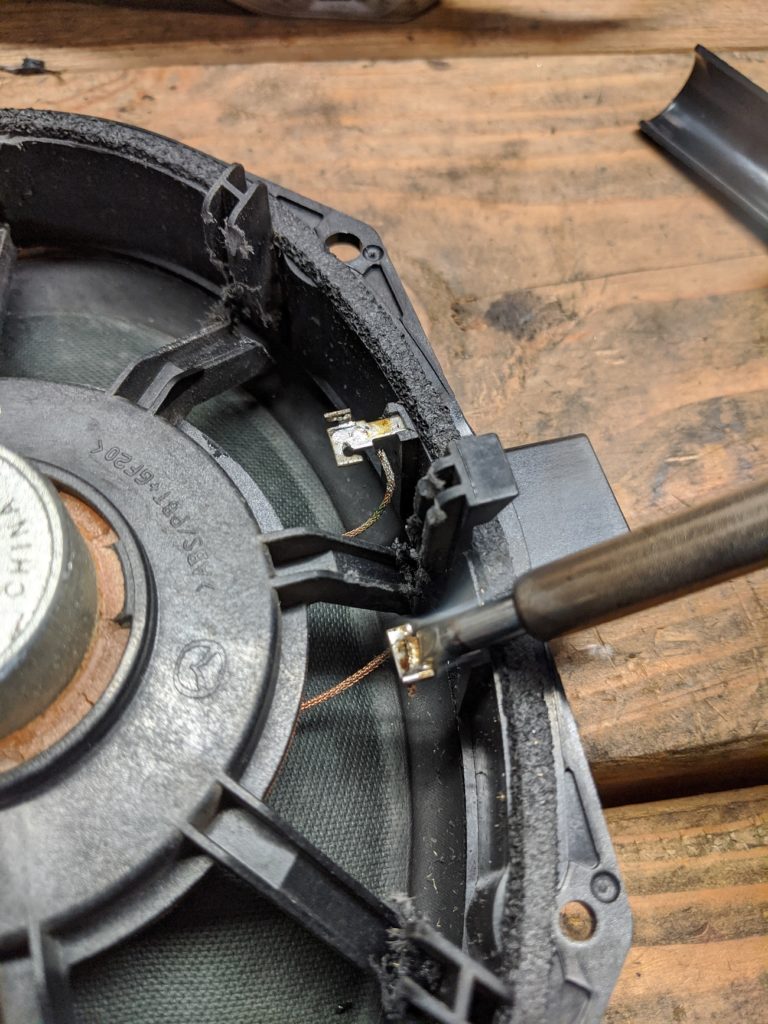
Now, unsolder the speaker wires from the riser. You will need a soldering iron to do this. Heat up the solder until it liquefies then pull the wires out from the mounting tabs. The speaker can now be removed from the riser.
Putting it together
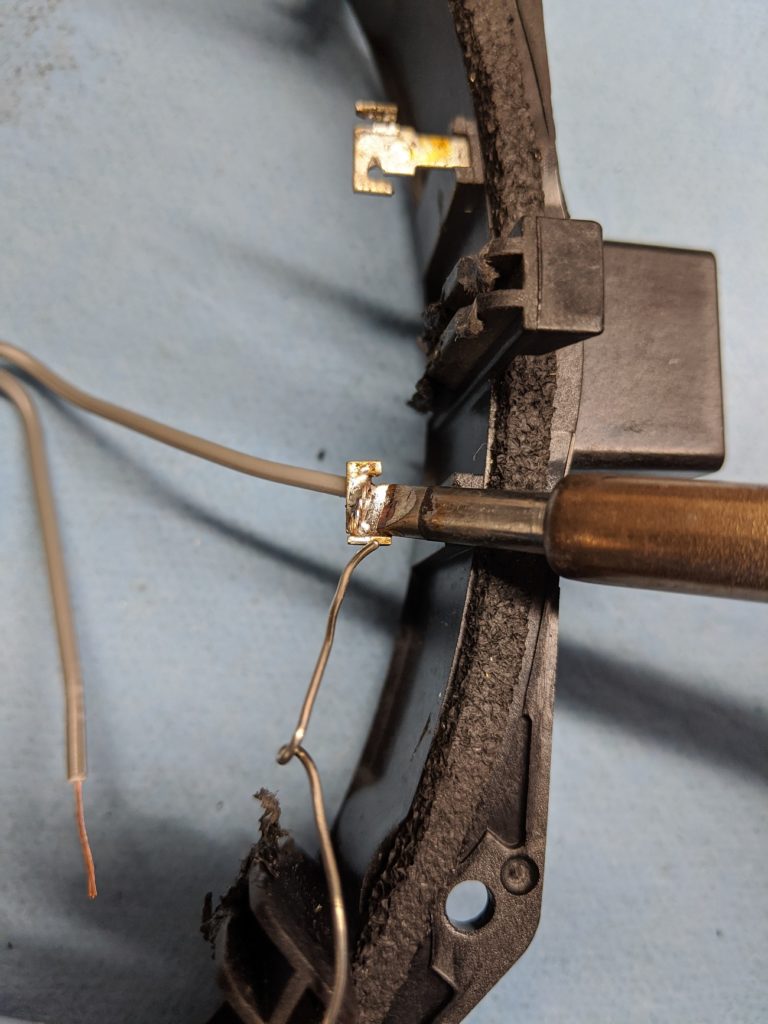
The new speakers should come with two pairs of wiring pigtails (one for each speaker) to be spliced into the car’s speaker wiring harness. Strip insulation off the ends of the wires and solder them to the terminals on the riser.

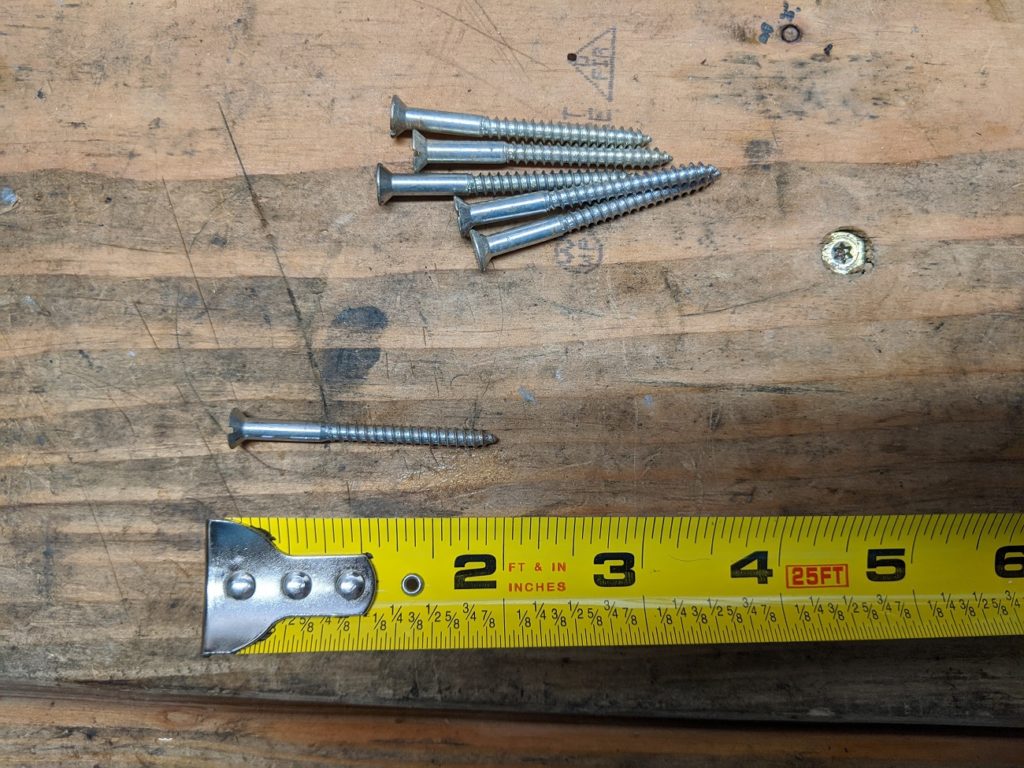
Plug the pigtail connectors into the terminals on the backside of the new speakers. Now you’re ready to install the speakers in the car. To do this, you will need to get longer mounting screws than the original ones that held the riser to the door card. I used some 2 inch wood screws I had laying around the garage. You’ll need 8 screws in total.
Pass the screws through the mounting holes of the speakers, then through the mounting holes of the riser bracket, and screw them into the door card. You are effectively sandwiching the speaker and riser plate together with the screws.
Reconnect the speaker’s electrical connector, turn the car’s ignition to Accessories, and try out the radio. The new speakers should be working great! All that’s left to do is reassemble the door. Congratulations, you’re done!
Brian
Thank you so much for this! But I have a follow up question – do you have any suggestions for replacing the tweeters? I looked on Crutchfield and everything says “modified fit”. Is that replacement complex?